|
Hello everyone, it has been a while. A long time ago, when I was beginning to use Linux, I found myself missing the layout of the Windows Skype which was that one window layout where at one side you will have your contacts and next to it you will have your conversation, and then I found this application called Skypetab-ng, which is as close at it will ever get to that layout. Installing Skypetab-ng You can easily install Skypetab by copying and pasting the following code in your terminal (Only working on Ubuntu based distributions): sudo add-apt-repository ppa:keks9n/skypetab sudo apt-get update sudo apt-get install skypetab-ng When you are done installing it, you should have two different instances of Skype, one that is the normal Skype and another one that is the Skypetab one. In order to get it to work you need to always launch the Skypetab one. 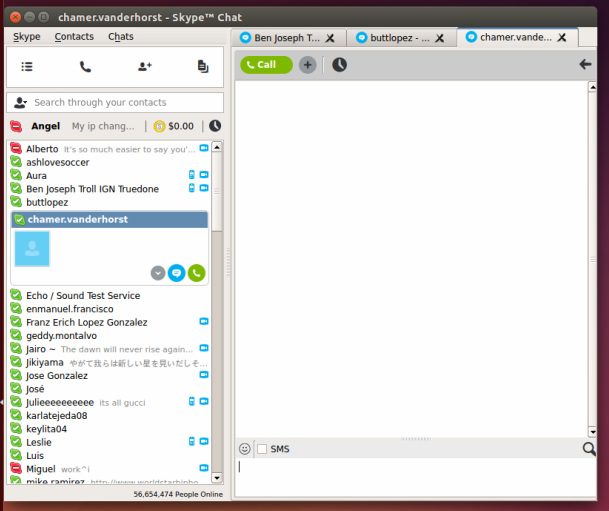 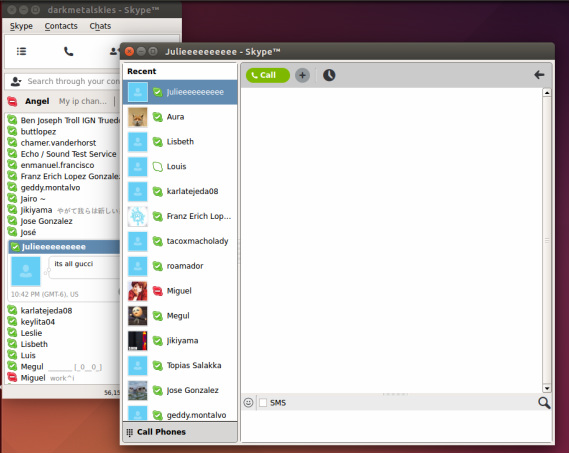 Skypetab puts all your windows in one, and instead of you clicking the contact every time you want to chat with him/her, you click a the tabs at the top right. This system can be more convenient if you are chatting to with a small amount of friends and you want to have them there all the time and be easy to find, mostly when you have many contacts. That's it, now you have a Skype that looks close to the one on Windows, and by the way, THANK YOU MICROSOFT FOR BARELY UPDATING SKYPE FOR LINUX YOU FUCKING ASSHOLES, EVEN THOUGH IT IS A DIFFERENT PLATFORM, WE ARE STILL USERS OF YOUR FUCKING SHITTY SERVICE SO GET YOUR SHIT TOGETHER AND TREAT US LIKE YOU TREAT WINDOWS/MAC OS USERS. ( at least we don't have ads on Skype for Linux but still, fuck). If Microsoft cared more about the actual users instead of looking at the platform itself as the competition, I will not be wasting my time writing this post.
You can find the blog of the developer of this app here [Click Here] and his github page here [Click here]. Also, if you want to see skypetab in action click here [Click Here]. Thank you for reading, if you have any questions regarding this application or its installation you can leave a comment in the comment section or you can contact me directly, my information is in the contact tab.
1 Comment
Hello everyone, today I am going to show you how you can install and configure an application called Burg which will remove your grub2 and install the app instead, then you will be able to choose from many different themes out there to make your booting process more appealing. The picture below shows one of the themes that will be included for burg in this tutorial, as you can see, it is more stylish than the booting menu interface of Grub2. This tutorial should work on Ubuntu 14.04 or any other Ubuntu based distribution that was based of that release, and also 12.04 but I am not completely sure (since I have not tested it in other releases other than 14.04). 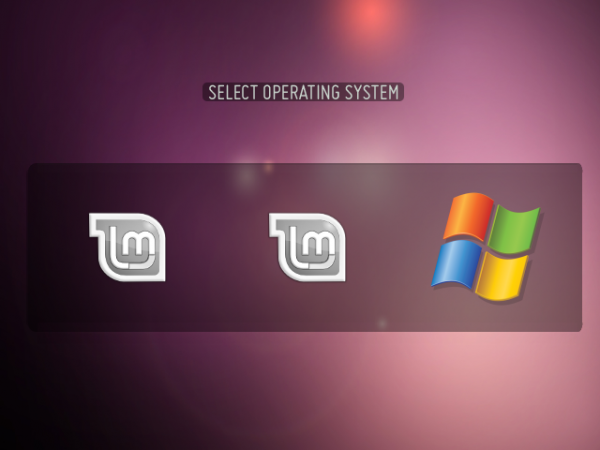 Installing Burg In order to install Burg, you need to open your terminal by pressing "CRTL + ALT + T" or by searching for it in your applications menu. Next, we are going to copy and paste each of the following lines separately to the terminal and press enter. sudo add-apt-repository -y ppa:n-muench/burg sudo apt-get update sudo apt-get install burg burg-themes When installing, you will get something like the image presented below, you need to press the space bar and it will put an asterisk in the box. What this is doing is selecting the hard drive in which you will be installing Burg, which should be the same one where your system is installed. If you press TAB it should highlight the "<Ok>" and then press enter. This will conclude the installation process. 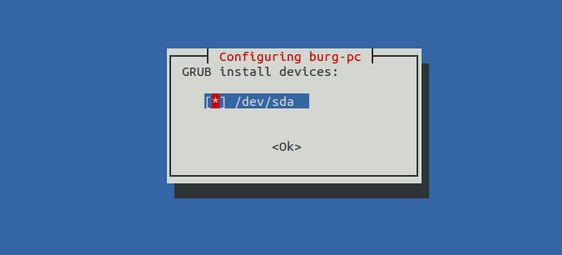 Installing Themes Now that we have Burg already installed, we can install some themes. By default, Burg will bring a somewhat decent amount of themes, but I have found four themes that I think will look fantastic in anyone's machine because they are simple and minimalistic, yet they look great. When you download the themes from their respective devianart pages (the download is located at the right side of the page). You are going to unzip them in your desktop, from there we need to move them to the Burg themes folder. In order to do this you need to type a command like this in your terminal: sudo cp -R ~/Desktop/foldername /boot/burg/themes Where "foldername" is the name of the theme folder that you want to move. If you think you are fine with the themes given, you can skip to the next part. There should be a space between the first path and the second path.
Configuring and Testing Now that we have Burg, as well as our themes installed, we need to run the following command: sudo update-burg This command will allow Burg to find the new themes that we have installed, as well as the operating systems installed in your computer. Now we can see what our Burg will look like by using the command: sudo burg-emu Now here we can change our theme by pressing the F2 key, select a theme and press enter and the theme should change. Now, we want to restart our computer because we need to go on the real deal and change the resolution of our Burg. In order to change the resolution we need to press the F3 key when it show us where we can select our operating systems. When you get to change the resolution you will see how much better it will look. Restore Grub2 If for some odd reason your Burg does not work or you want to just go back to the good old Grub2 menu,you can re-install it by using the following command: sudo grub-install /dev/sda This will restore your old Grub2 menu. Now we are done! We should have a really fancy boot menu that you can show to your friends and family or you can brag about on /g/. If you have any questions related to this article please leave them in the comments below or contact me directly, my information is in the contact tab.
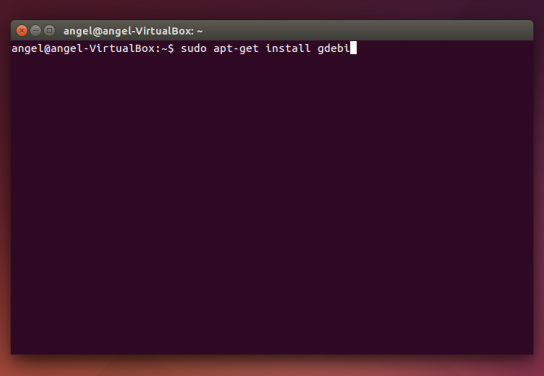
Hello everyone. Since I have been hearing a lot of complaints regarding Steam installation process through the Ubuntu software center not working properly, I have decided to create a tutorial focusing on how to install it using the installer provided in the Steam page. This tutorial is very straightforward, we first are going to install an application called "Gdebi" which will help us install the .deb file provided by steam and then we are going to download the file from the page, open it with Gdebi and install it. Installing Gdebi
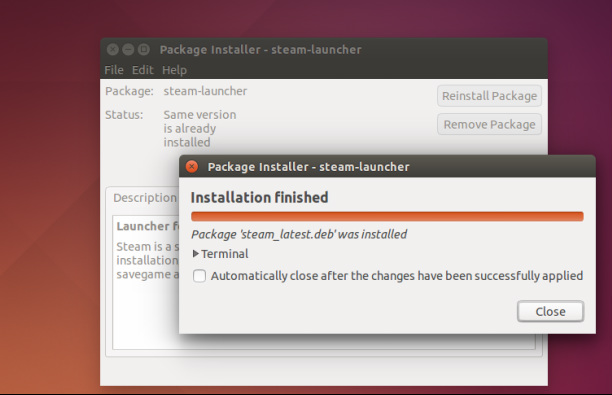
Downloading Steam Now that we have have Gdebi installed, the next step is to download the steam installer file, which comes in the form of a .deb file. You can click here to go directly to the download page. [Click Here] 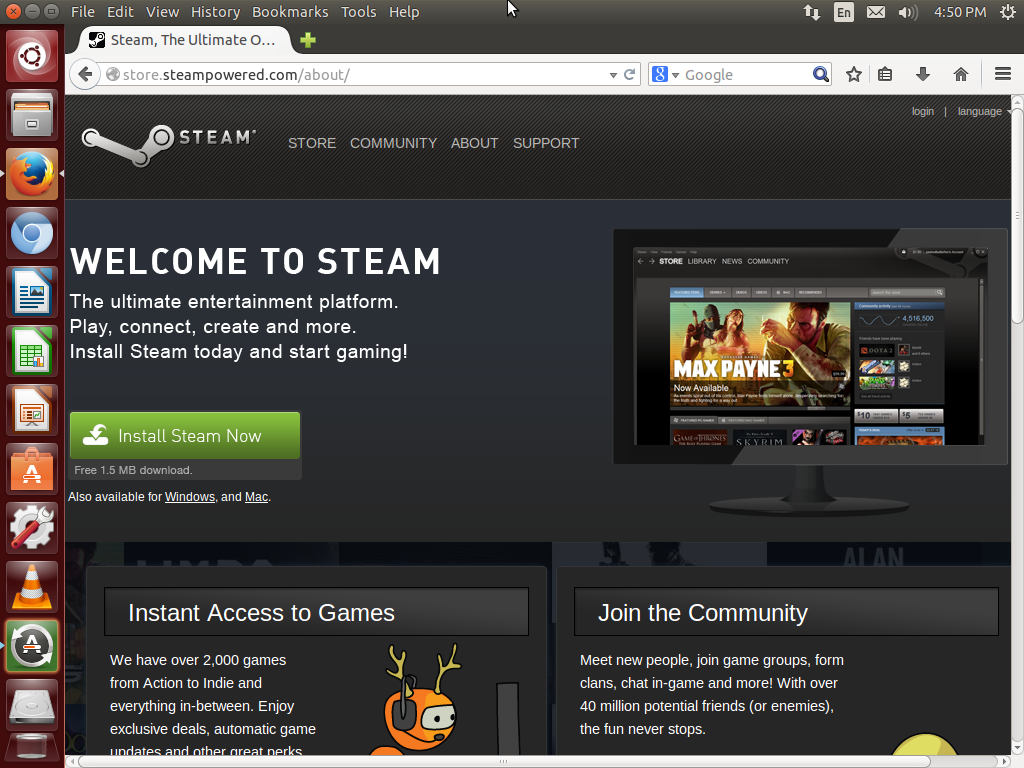 The web browser will ask you if you want to open it or save it, click save and then click Ok. If you click "Open With" instead, it might have issues when installing. 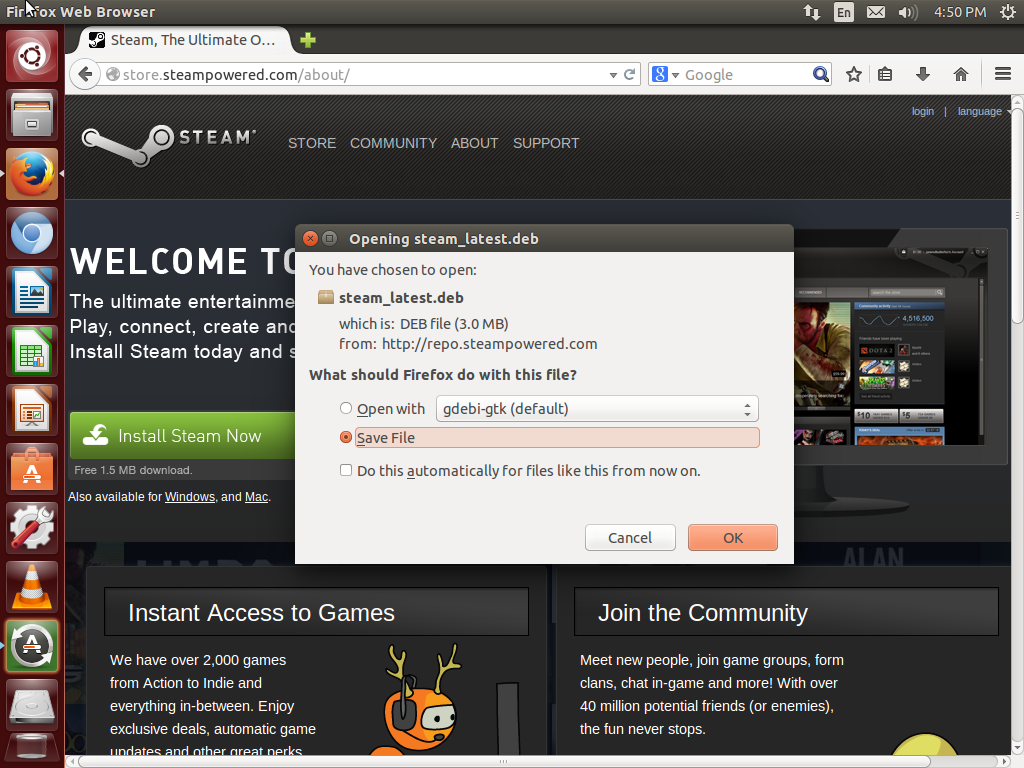 Installing Steam Now we need to install the file, navigate to your downloads folder and look for the "steam_latest.deb" file. In my case I don't have many files in my downloads folder which made it easy to look for it. 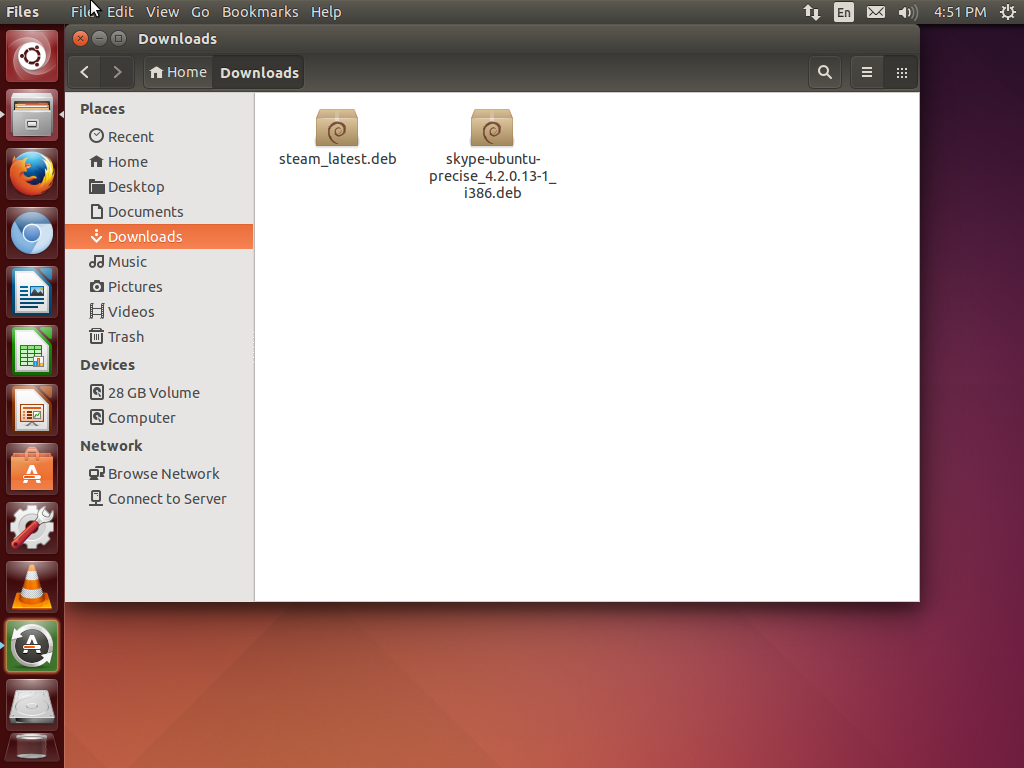 Next you want to right click the file, click "Open With" and then select "Gdebi Package installer". This will open up Gdebi. 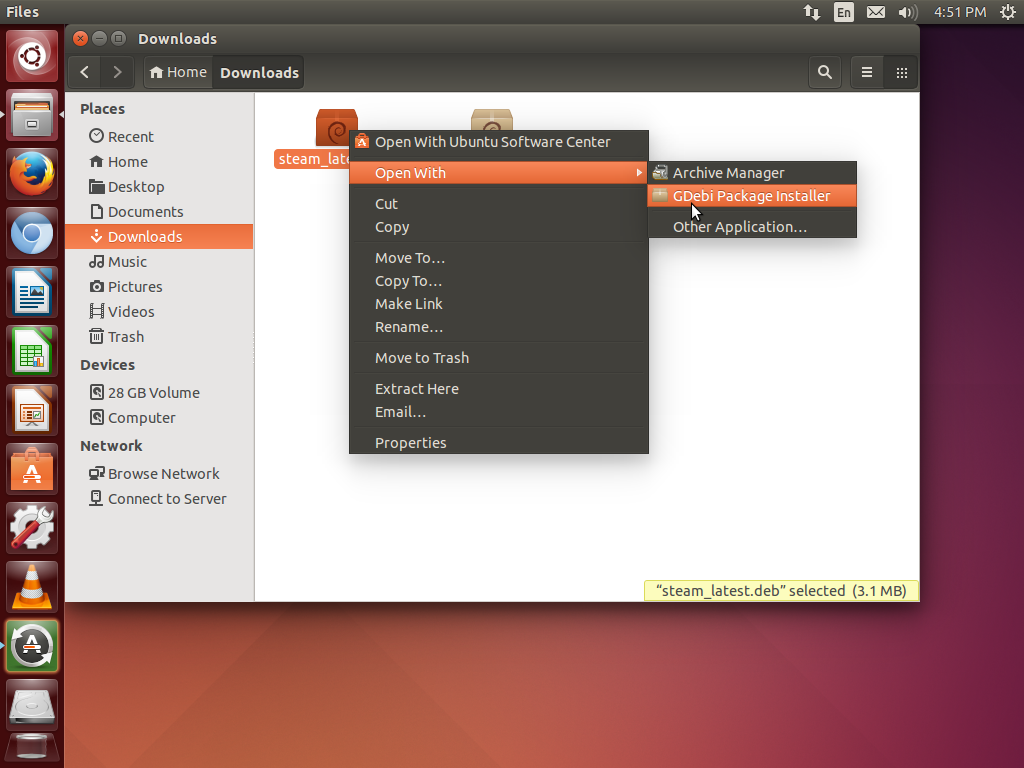 Now Gdebi will display the information related to the package, as well as dependencies that it needs and other information. Click "Install Package" and it will prompt you with a window asking for your password, type your password and the installation process will begin. 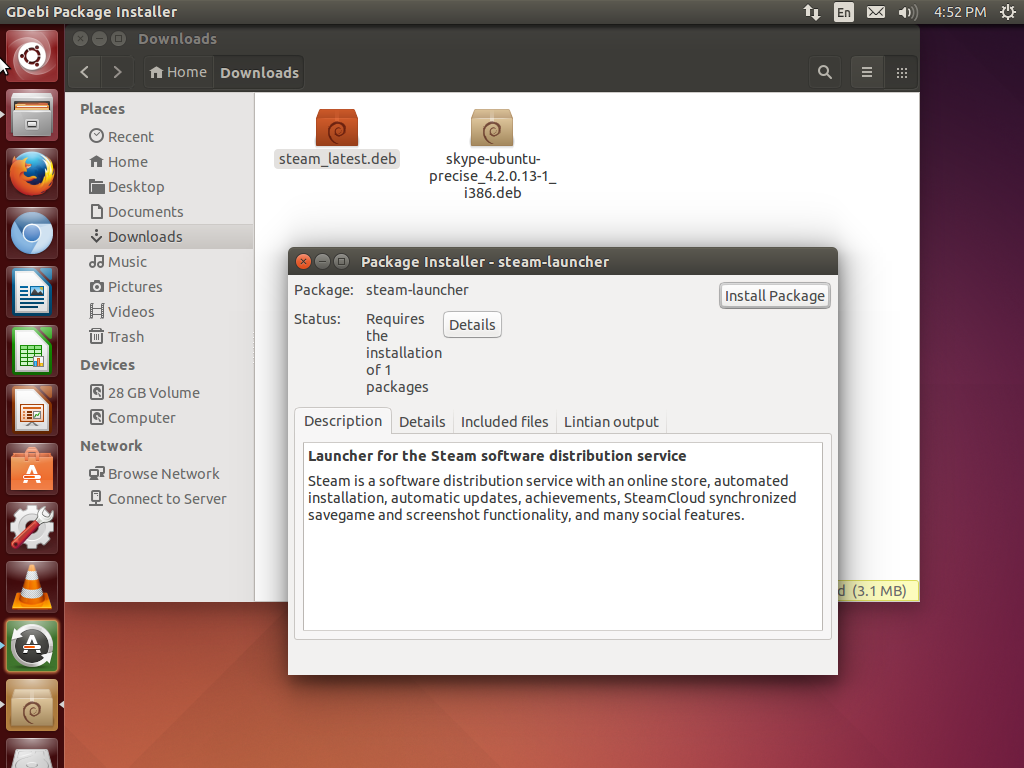
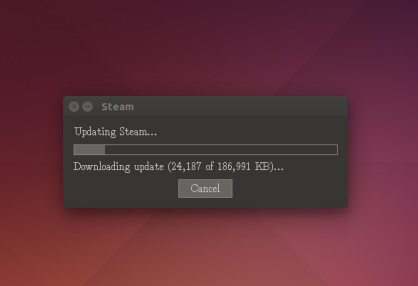
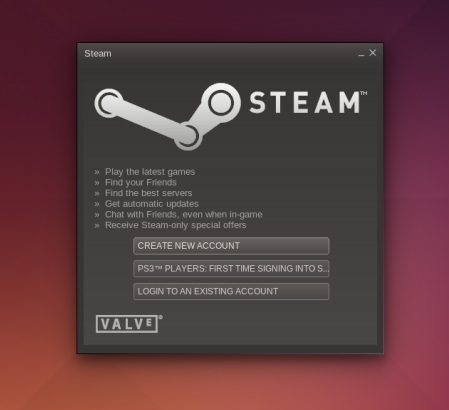
Running Steam In order to launch steam, you need to tap your windows key and type "Steam". From there you can either open it, or move it to the launcher bar where you will be able to launch it easily. In order to do this, you just drag the Steam icon to the bar at the left of your screen. 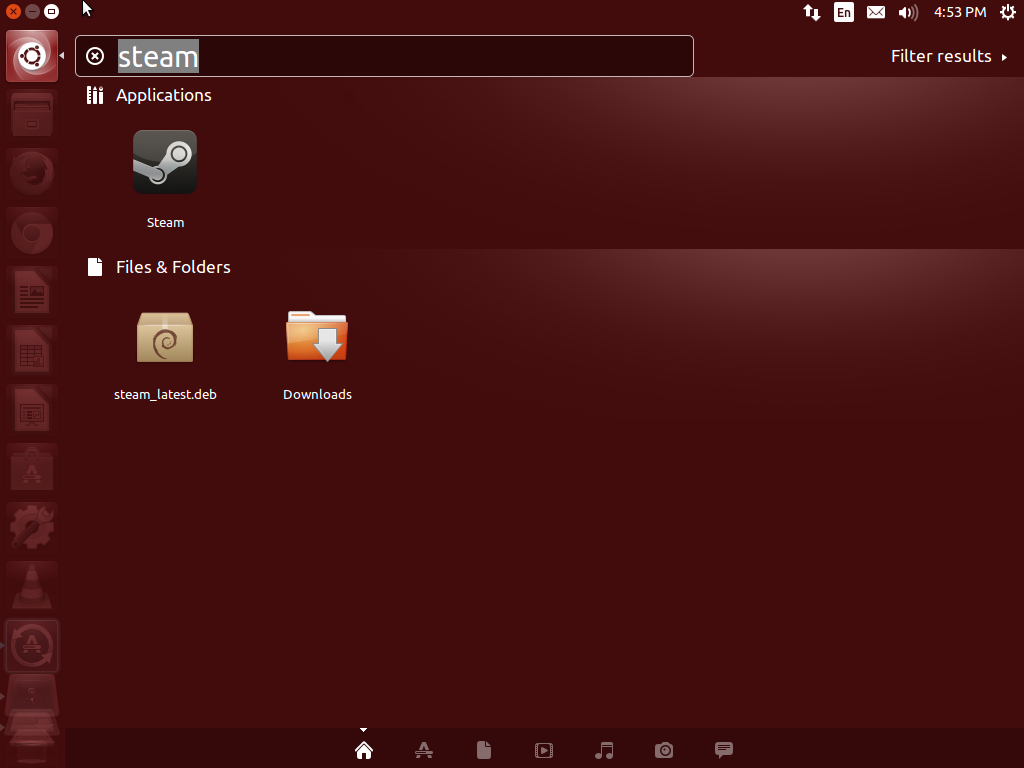
Edit: Thanks to everyone that has been leaving comments at the end of the post, you guys rock. Also, I added at the end of the post how to get the back-lights to turn on while booting, thanks to Mik for posting it in the comments. The CM Storm Devastator (Price and details here [Click Here] ) is a very cheap keyboard and mouse gaming bundle ranging at $30 which includes back-lighting and other features that make it comparable to more pricey alternatives, but there is one problem, under Linux there are no drivers provided by Cooler Master or support built in the Linux kernel for the key back-light to work out of the box (The mouse back-light works properly, the problem is with the keyboard). In this tutorial, we are going to get the keyboard back-light working under Linux and we are also going to make them switch on when we login (Something that you can't do under Windows). Warning: Even if this tutorial was made under Linux Mint (Cinnamon), the core ideas are the same, you just need to apply it to your distribution of choice and it should work perfectly. Edit: Thank you all for the lovely feedback that you all have left in the comments, this post has been the post that I have been getting the most feedback about. Making the back-lights turn on/off with the keyboard While doing some research, I found, digging through forums that there are two different commands to get the keyboard back-lights to be able to switch on or off. In order for the back-lights to turn on the command that you need to use is: xset led 3 In order for the back-lights to turn off the command that you need to use is: xset -led 3 Now that we know this, we can even test this in the terminal if we want to, but it is supposed to work. Now, we need to make it so we can turn it on and off by only using the keyboard, which can be achieved by binding these commands to the keys. In order to do this, you need to open an app in your distribution called "Keyboard shortcuts" or "keybindings" or "keyboard" (For me, under Linux Mint Debian Edition it was under Settings > Keyboard > Keyboard Shortcuts, but for something like Ubuntu it might be different, if a lot of people are struggling applying this tutorial under Ubuntu or other distributions, I might make an updated version including those distributions). 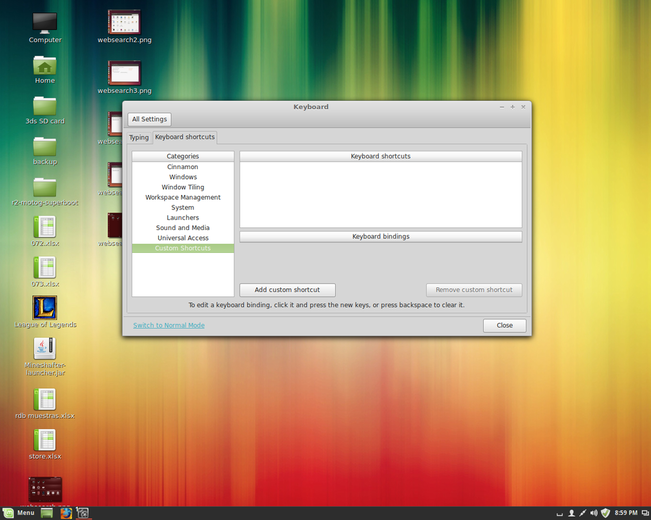 When we have the application open, we want to click on "Add custom shortcut", give a name to the shortcut (in my case i named it "Keyboard LED On"), and in the command field we want to add that command that will turn the back-lights on, which is "xset led 3". 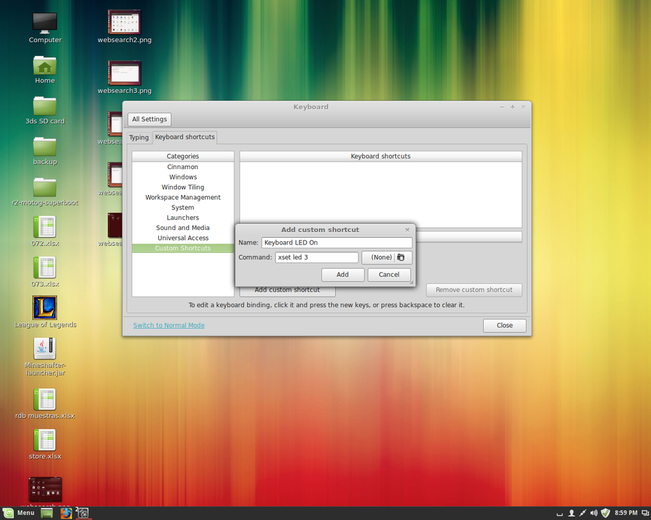 When we are done, we want to click the "Add" button and it will add the key-binding to the list, now we need to bind the physical key to it. Click the rectangle below where it says "Keyboard bindings" and when the text in it changes and shifts to the left, press the key in your keyboard labeled as "SCR LK".  Now here is where we encounter a small problem, there is no way for us to be able to toggle between on and off using this type of key bindings, because the system thinks that each binding is supposed to perform only one action, in our case, the one that we did before will only turn on the keyboard when pressing the "SCR LK" key. In order to solve this problem, what I decided to do was to bite the bullet and bind the "xset -led 3" command to the "Pause" key which is next to the "SCR LK" key. Now, as before, we are going to click the "Add custom shortcut" button and give it a name, in my case I named it "Keyboard LED Off" and in the command field you need to add the command "xset -led 3" and then click "Add". 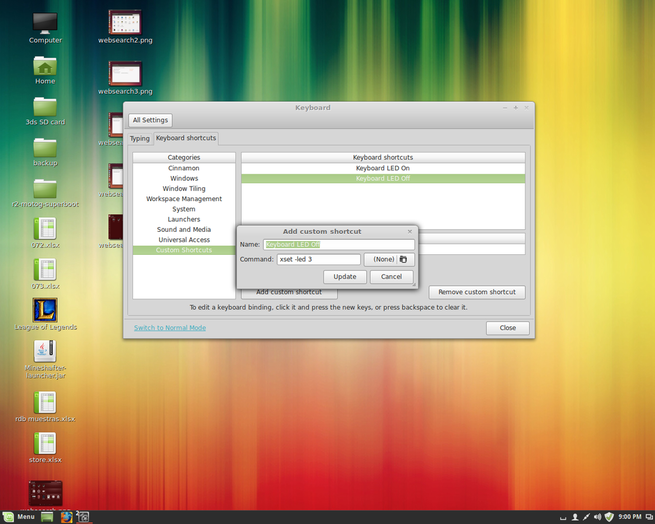 Now, as we did before, we need to bind the key to the command itself, in my case I decided to use the "Pause" key. 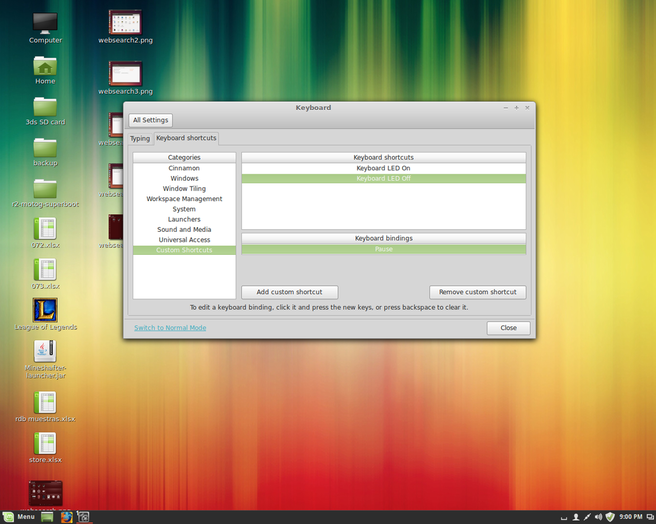 Now we are done, your keyboard back-lighting should be working. The good thing about this is that if we want to, we can change the key binding to any other that we would like to and not be forced to use the "SCR LK" or "Pause" keys, for instance you could make it use "INS" or any other key that we would like, as long as it does not conflict with any other system function. Turning on the back-lighting at Login Something cool that we can also is to make the keyboard back-lights to turn on automatically when we log into our session. To do this, we need to open an application called "Startup Applications", which allow us to configure the applications that start automatically when we log into our session, but we can also set commands to be executed when we log in as well. When you have the application open, click "Add", this will bring up a small window. In the name field, you can name it whatever you want to, in my case I didn't give a name to it at all. In the commands field you need to type the command that turns the keyboard back-light on which is "xset led 3". You can give a comment to it if you want, which is just a description of what it will do and then click "Save". Now we are done and the Devastator should turn on by default when we log in! 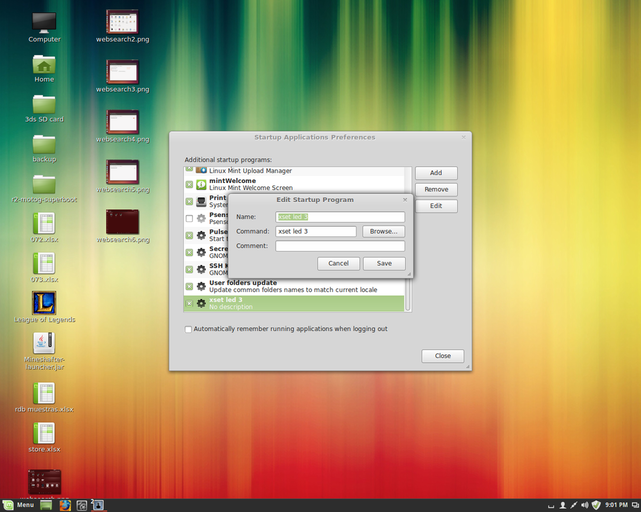 If you enjoyed this post, please be sure to check out my other Linux related posts. If you have any questions, please leave them in the comments section or contact me directly, my contact information is in the "Contact tab". Turning the Back-Lights on while booting up (Ubuntu only) Thanks to Mik in the comments for posting this in the comments, I have seen that some people wanted to know how to do this, and I was researching how to do it, but gladly Mik posted it first saving me some research time.
Edit the following file with nano or any other text editor : /usr/share/lightdm/lightdm.conf.d/50-unity-greeter.conf Example: sudo gedit /usr/share/lightdm/lightdm.conf.d/50-unity-greeter.conf add the line: greeter-setup-script= xset led 3 And it should work properly. Again, thanks to Mik for posting it in the comments, make sure to say thank you to him too. Not long ago, Ubuntu added to their dash the feature of being able to show search results from different online sources, which can be either really useful or really fucking annoying, mostly because it slows down your search time, clutter your searches with random products and media, and also sends your searches to a web server owned by canonical, which some people might not like, but there is a way that we can disable this feature and make dash searches cleaner and faster. 
The first thing that we need to do is open the system settings, it should be located at the left side of the screen, with the icon of a big gear. The system settings can be also found in the dash or in the small gear icon located at the top right side of the screen. When you have it open, you are going to click the icon that is called "Security & Privacy". 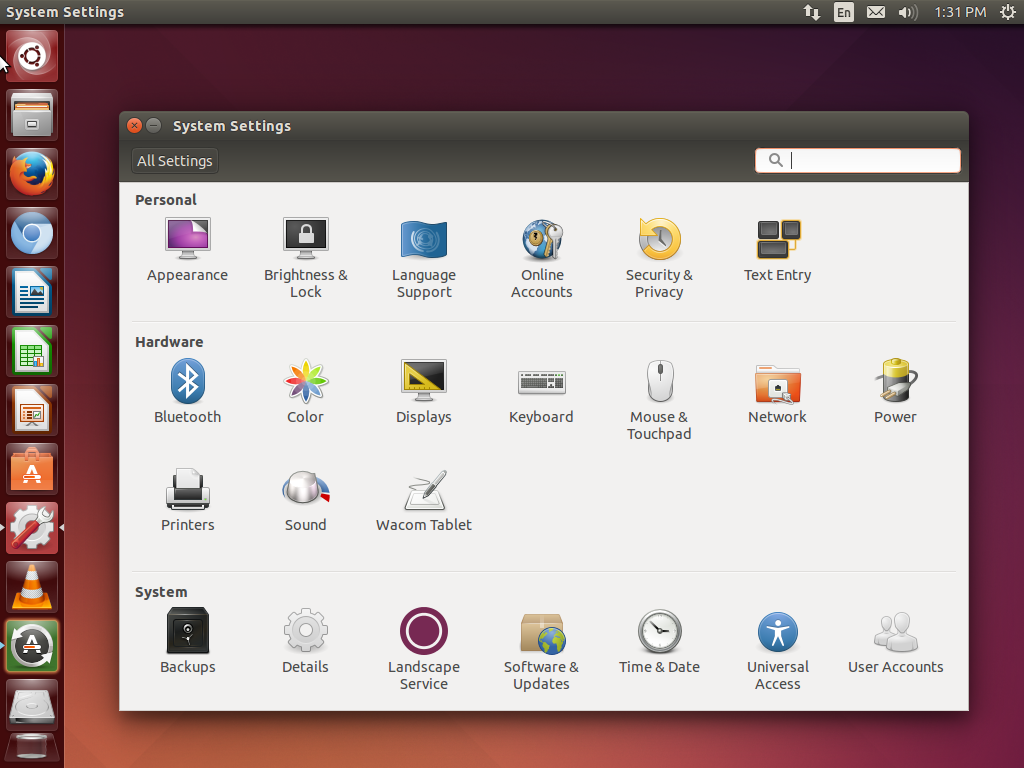
The security and privacy settings were added not long ago to please the demands of people to be able to make their system more secure, there are not many options here, but the ones that are there are pretty useful. We want to click the tab that says "Search". 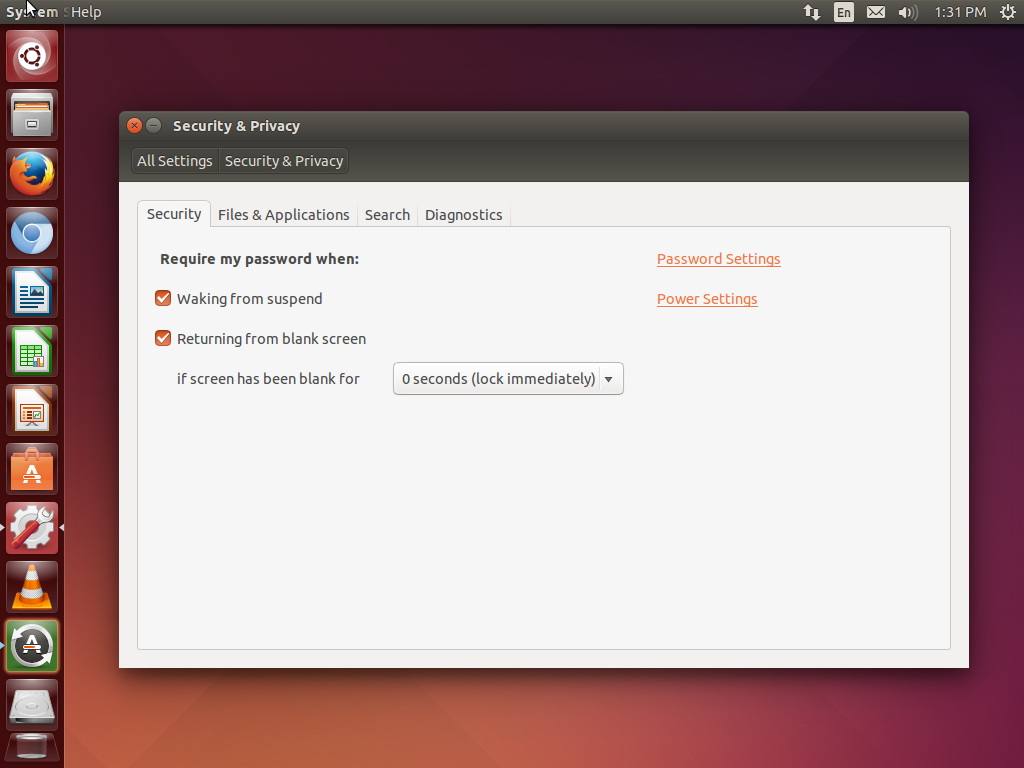
Now we are in the search tab, here its the only setting that allows web search to be included in your dash. Disable that setting by clicking the icon that says "ON". 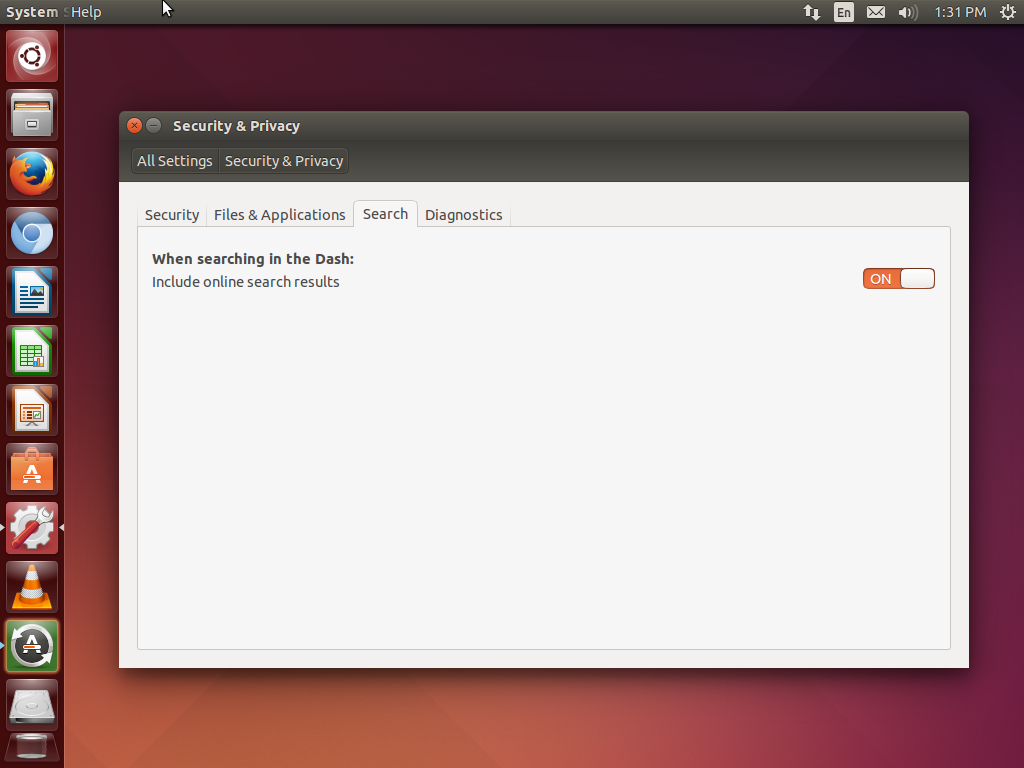
Close the window and now search on your dash and you will see that there are no more web results when we try to search for something on the dash. Search will only include applications in your system as well as folder and files. 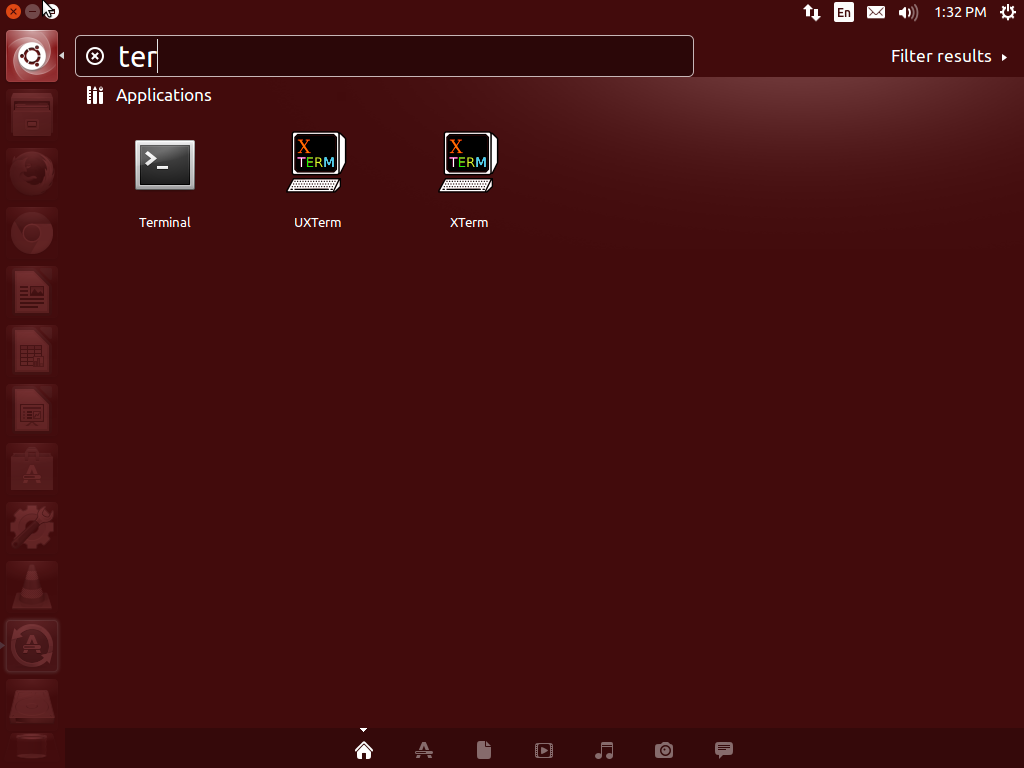
Now your Linux experience should be improved by at least 10%, the dash can be pretty useful for launching files, folder and applications. You can just press the Windows key, type the name of the application that you want to open, complete or not and then press enter. This can save you a shitload of time when you are doing anything. If you liked this post, make sure to share with with a Linux novice in need, also if you have question, leave them in the comments down below or go to the contact tab and contact me directly.
Do you want to switch to Linux but you don't want to install it next to your Windows partitions, or do not have another machine to test it before installing it? Well this tutorial is just for you. In this tutorial, we will be setting up a virtual machine with the well known software called Virtualbox, which is pretty much a software that allows us to run an operating system inside of another operating system (yo dawg I heard you like operating systems!). This system will take resources from your physical machine (Ram, video memory, processing power, disk space) so it is recommended to be aware of the specifications of your physical system, you don't want to run an operating system and end up lagging your host system and your client system at the same time. Now that we have explained these concepts, lets get started. First, we need to download Virtualbox, you can go to their downland page by clicking here [Click Here]. After you are in the page, download the Windows version, this version is multi-architecture so it will work fine in 32 and 64 bits systems. The download is 104MB, so if you have a slow connection, now it is time for you to get something to drink or do something else. When Virtualbox is downloaded, you can go ahead and install it as you will install any application in Windows. We also need to download the installation image of the distribution/operating system that we are going to install, in this case we will be installing Ubuntu, you can click here to go to their download page. [Click Here] Creating a new virtual machine Now that you have installed Virtualbox and you have already downloaded the image of the operating system that you will like to use, open Virtualbox and you will get a screen like the one shown in the image below. Click where it says "New" in order to create a new virtual machine. 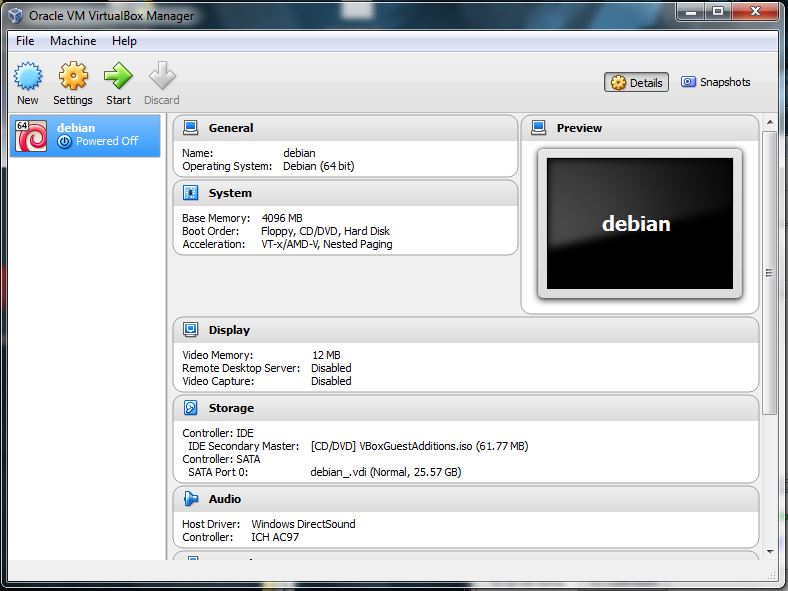
Naming and selecting distribution/operating system Okay, so when we click new, we will get a small window similar to the one in the image below. In the first field we can give a name to our virtual machine. In the second field named "Type" we choose the operating system type that we are going to install. In the third field, out of the first operating system type that we choose, we need to choose a version of it. Moving down we are able to see the field that says "Memory Size", which is referring to the amount of random access memory (RAM) that we would like to allocate to our system. In this part we need to be careful, mostly because if we give a lot of ram to the system, it might affect our host system and make it slow, or if we give it a small amount of ram memory it might be extremely slow and will not function properly. Now, moving down we will find the "Hard drive" section, here we can choose if we want to use an existing drive, create a new one or just not use a drive at all. If you click down where it says "Show descriptions" it will change the interface and it will show descriptions of each thing separately. 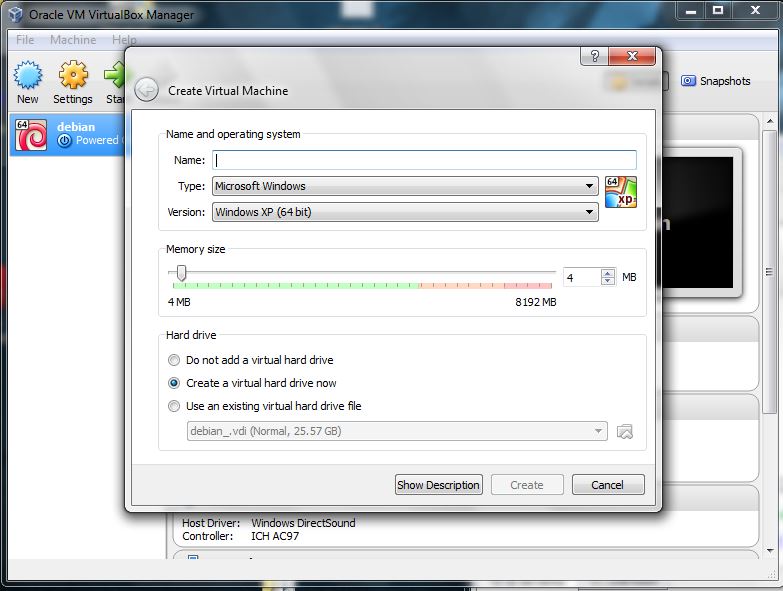
For the sake of this tutorial, we will name the virtual machine "Ubuntu", because that is the distribution that we will be using. VirtualBox will automatically choose the type and version of the operating system that we will be installing, if you want you can change it, for some distributions it might be wrong though. Now here its where it might get a little weird, we need to select memory size. Depending on the amount of ram that you have, VirtualBox will tell you how much ram you can allocate to your virtual machine. In my case, my desktop has 8GB of ram, so I decided to assign 2-4GB because It won't affect my host computer, and it is located in a safe range of usage. VirtualBox gives you a visual representation of how much ram will be safe to allocate to your virtual machine, which is shown with that green bar, anywhere inside of it should be safe, yellow might be safe, red is not safe. If you have a 4GB of ram in your system, about 1.5GB should be alright. In the Hard Drive section we want to leave it as it is, because we want to create a new drive. Usually you want to create new drives to keep each operating system isolated from each other. When you are done, you can click "Create". 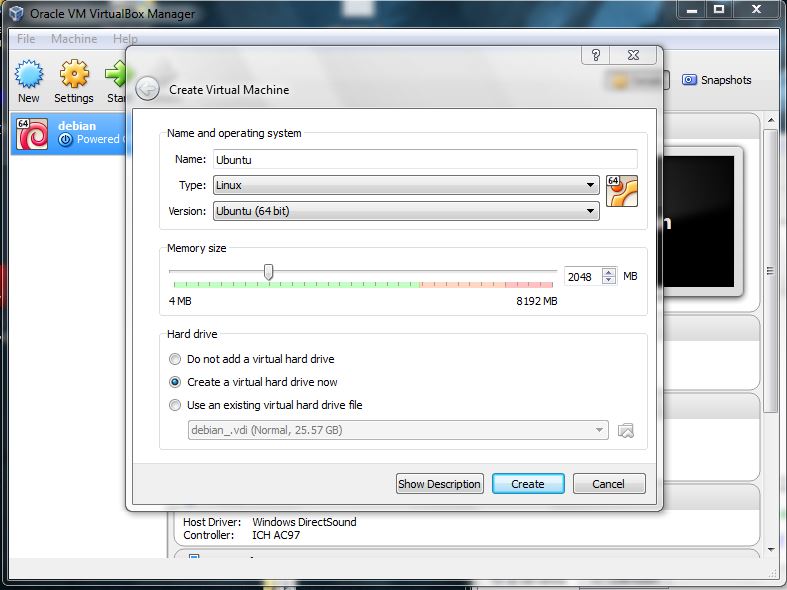
Creating the storage for the virtual machine When you click create, you will get to the "Create Virtual Hard Drive" window, here we will be specifying some information related to the creating of the virtual hard drive that the operating system will be in. In the first field, named "File location" we will be leaving it as it is, since we don't have to mess with it. In the field that says "File size" we need to specify how big we want this hard drive to be. Depending on the operating system, it will require more or less space depending on the minimum requirements set by it. I believe that the minimum requirements for Ubuntu are 8GB. I will recommend to set it to be at least 20GB or up. In the Hard drive file type you can leave it as it is, since it is default of VirtualBox. In the "Storage on physical hard drive" section, we will choose "Dynamically allocated", because it will only consume the space that we are using, rather than taking a chunk of our space and using it for the system itself. Here its the definitions provided by it about these two types of storage, it is important for you to know their meaning: -Dynamically allocated hard drive files will only use space on your physical hard drive as it fill us (up to the maximum fixed size), although it will not shrink again automatically when space is freed. -Fixed size hard drive file may take longer to create on some systems but is often faster to use. Now we can click create and it will finish the creation of the profile of the virtual machine that we want to create. 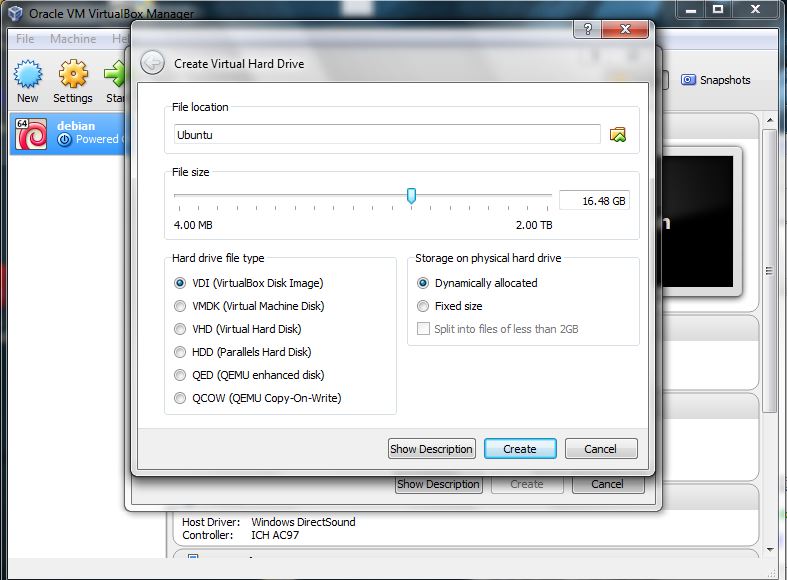
Now we are able to see that the the profile has been created. From here we can either run it by clicking "Start" or go to the "settings" and change some things before we start it up. 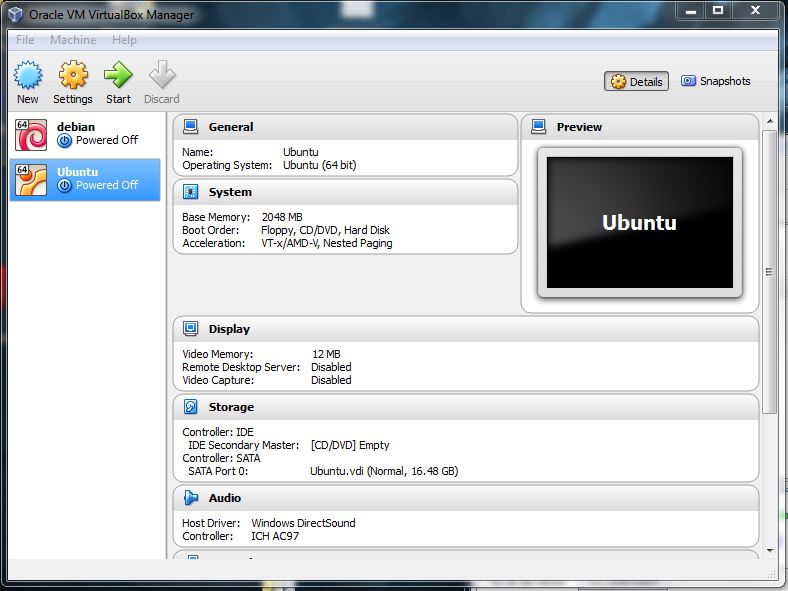
Other changes before booting (optional) This is an optional step, but if you go on the settings of the virtual machine you can change different things before firing it up for the first time. For instance, one setting that I like to change (under System > Processor) is the amount of CPU cores that the virtual machine is allowed to use, for instance, my computer has a shitty dual core processor (don't judge, it gets the work done), I would like it to use both cores in order for it to have more processing power and perform better. 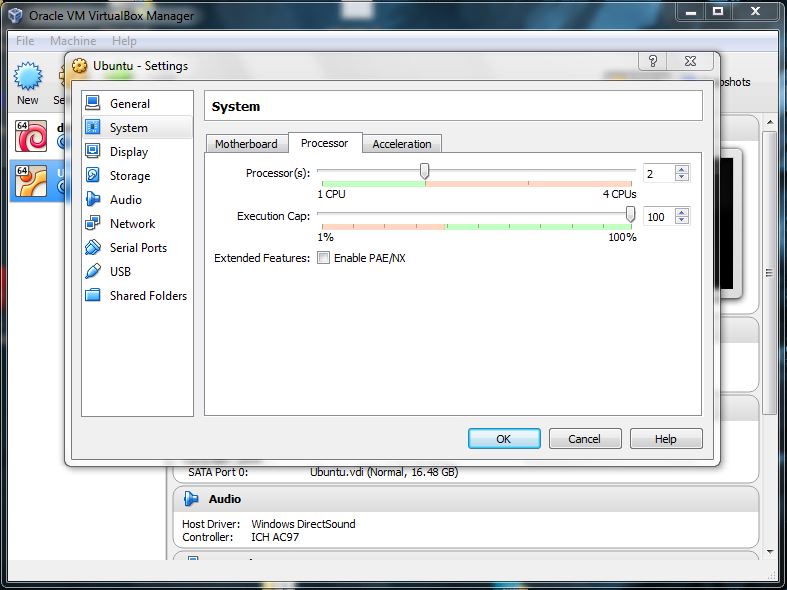
In the video settings (Under Display > Video) I like to increase the amount of video memory given to the virtual machine to the cap. This will allow graphics to perform better overall. (Too bad the cap is 128MB, If I could get it to at least 1GB I could do some decent gaming with a virtual machine). Now, where it says "Extended Features", you can enable 3D and 2D acceleration too. Be aware that you need to enable these after the installation of the operating system has been completed and you need to have installed the "Oracle VM VirtualBox Extension Pack" which can be downloaded from the VirtualBox download page. 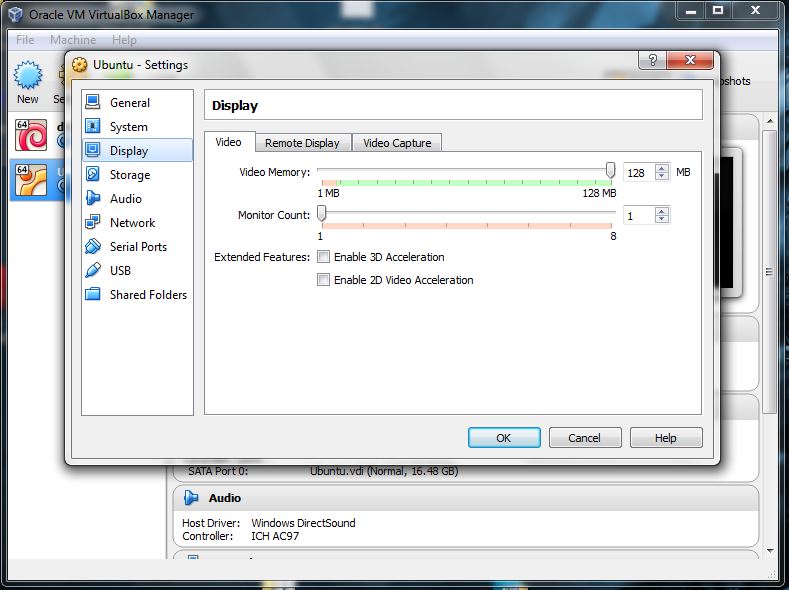
Booting the virtual machine Now that everything is ready, you can select the virtual machine profile and click "Start" and it will launch it, now you need to choose the image that you downloaded before by clicking the little folder with the green arrow. When you click "Start" it will launch and it will boot to the image that you have provided, from there you can follow my other tutorial on how to install Ubuntu 14.04 by clicking here [Click Here] and skip to the part that says "Booting and Installing Ubuntu 14.04". 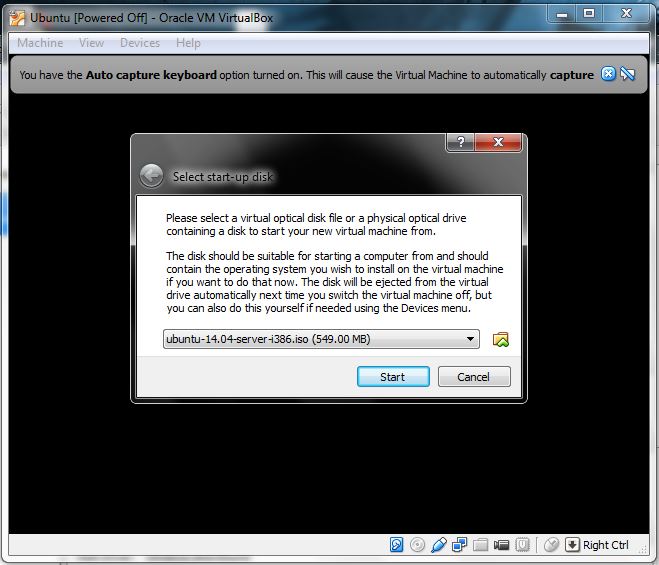
Congratulations, now you know how to set up a virtual machine. Virtual machines can be used for many different purposes, for instance, you can try many different distributions of Linux and test them out to see which one you like and then install it directly to your physical hard drive, I used to do this when I first switched to Linux. Another use for it is to test out shady applications that you think might end up your system or getting you in trouble (not encouraging piracy here). If you have more than one monitor, you can one virtual machine open in one screen and your host system open in another screen, getting the best out of both worlds. Overall Virtual machines can help you a lot in many different occasions and can also improve your computer skills.
Let me know if you liked this post and what else you would like to see in the future, I am open to suggestions. You can always leave a comment in this post or contact me directly with questions or things that you will like me to change or add. Hello and welcome again. Today we will be talking about one of the most used ways to get software that is not in the default distribution repositories, the PPAs. As stated by the Launchpad.net page, "Personal Package Archives (PPA) allow you to upload Ubuntu source packages to be built and published as an apt repository by Launchpad. You can find out more about PPAs and how to use them in our help page.", In simple terms this means that someone can upload their app to Launchpad and then provide you with a small type of link called "PPA" that you can add to your list of application repositories for it to be able to allow your system to install that certain application and also update it directly. This method is only used by Ubuntu and distributions based of it (Which are many), meaning that you can have an installation of Linux Mint and use the same PPA system to install a certain application. Now that we have covered the definitions and uses of PPAs we can start with the practice. For our example we will be using the Numix Shine icon theme, this is one of the many icon themes that they have. You can visit their page [Click Here] and choose anything there or go directly to this icon theme [Click Here]. Remember, this is only an example, but this same method will work with any other application that uses PPAs. 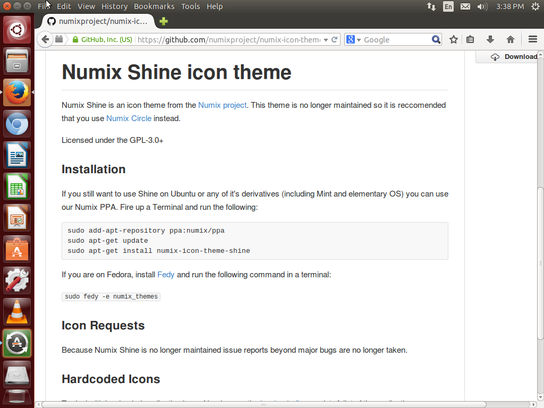
If you decided to pick the same icon theme you see something like this inside of a box (it is shown in the image above as well): sudo add-apt-repository ppa:numix/ppa sudo apt-get update sudo apt-get install numix-icon-theme-shine Now lets discuss what this means. The first line "Sudo add-apt-repository" allow us to add "ppa:numix/ppa" to our repositories list. The second code, "sudo apt-get update" allows us to refresh or update our repositories list so our system will check for new repositories and also check their status. The third line "sudo apt-get install numix-icon-theme-shine", like we discussed in our previous post, is the command that we will use to download and install the application, in this case is the Numix Shine. Now in order to get this going we need to open the terminal and copy and paste the first code. If you don't remember how to open the terminal, it was CTRL + ALT + T or you can press the Windows key on your keyboard (between ALT and CRTL) and type "Terminal" and press enter. 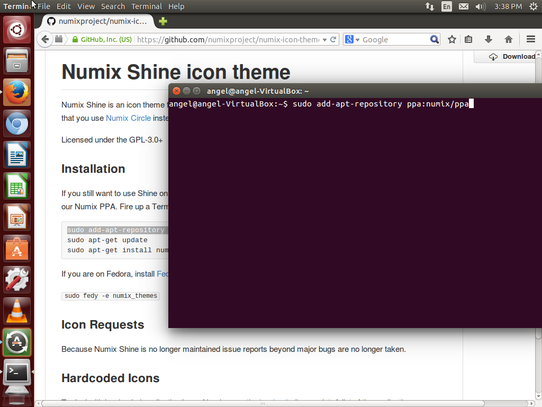
When we have our terminal open, we want to copy and paste the first line and press enter. 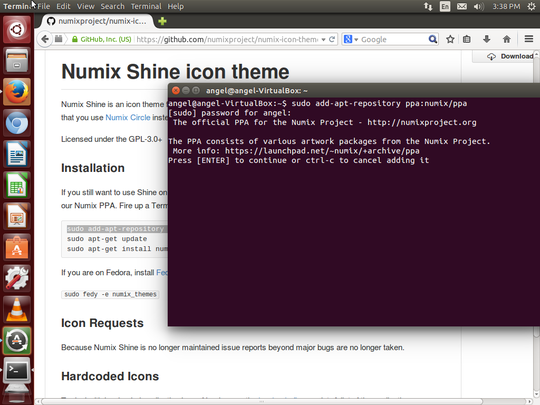
After you do this, the command line will show you some information about the PPA itself and will tell you that if you want to continue you need to press the enter key and if you want to cancel adding the PPA you must press CTRL + C. Press enter and the process will be completed. 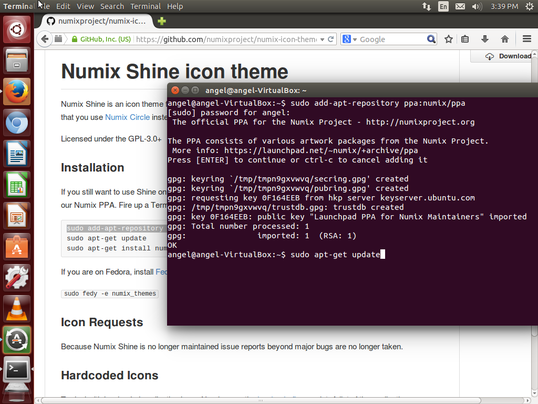
The next step is to refresh our repository list. in order to do this we copy and paste the second, "sudo apt-get update" line in the terminal. 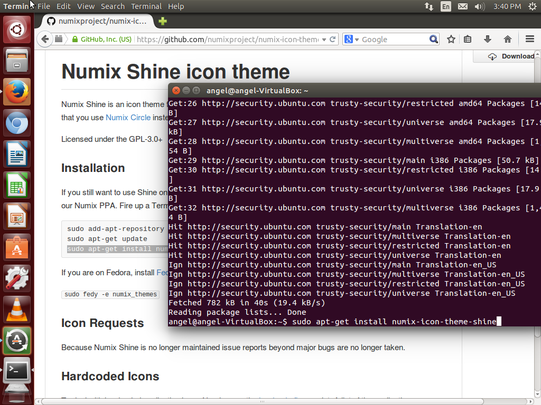
The final step here is to install the application by copying and pasting the line "sudo apt-get install numix-icon-theme-shine" and it will start downloading the icon theme and that's it, we are done! Because this is an icon theme, we won't be able to see the application or apply it at all unless you have a special application to customize your desktop called "Unity Tweak", if you want, you can go ahead and install it with the command "sudo apt-get install unity-tweak-tool" or download it from here [Click Here]. If we were installing any other application we will be able launch it from the dash directly. Now that you know how to install applications with that require PPA to be installed, you can go out and get them all! if you liked the post, share it with a Linux novice in need, also if you think I should change something in this post, you can contact me directly and let me know or leave a comment in the post.
|
Angel MercedesElectrical Engineering student and lover of all things Open Source, 3D Printing, Electronics and Linux. Categories
All
Archives
May 2017
|
 RSS Feed
