|
Do you want to switch to Linux but you don't want to install it next to your Windows partitions, or do not have another machine to test it before installing it? Well this tutorial is just for you. In this tutorial, we will be setting up a virtual machine with the well known software called Virtualbox, which is pretty much a software that allows us to run an operating system inside of another operating system (yo dawg I heard you like operating systems!). This system will take resources from your physical machine (Ram, video memory, processing power, disk space) so it is recommended to be aware of the specifications of your physical system, you don't want to run an operating system and end up lagging your host system and your client system at the same time. Now that we have explained these concepts, lets get started. First, we need to download Virtualbox, you can go to their downland page by clicking here [Click Here]. After you are in the page, download the Windows version, this version is multi-architecture so it will work fine in 32 and 64 bits systems. The download is 104MB, so if you have a slow connection, now it is time for you to get something to drink or do something else. When Virtualbox is downloaded, you can go ahead and install it as you will install any application in Windows. We also need to download the installation image of the distribution/operating system that we are going to install, in this case we will be installing Ubuntu, you can click here to go to their download page. [Click Here] Creating a new virtual machine Now that you have installed Virtualbox and you have already downloaded the image of the operating system that you will like to use, open Virtualbox and you will get a screen like the one shown in the image below. Click where it says "New" in order to create a new virtual machine. 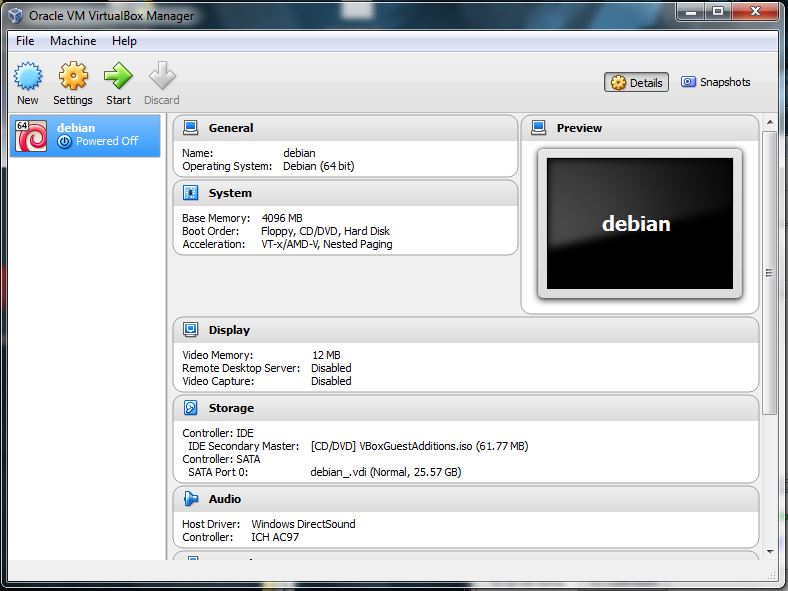
Naming and selecting distribution/operating system Okay, so when we click new, we will get a small window similar to the one in the image below. In the first field we can give a name to our virtual machine. In the second field named "Type" we choose the operating system type that we are going to install. In the third field, out of the first operating system type that we choose, we need to choose a version of it. Moving down we are able to see the field that says "Memory Size", which is referring to the amount of random access memory (RAM) that we would like to allocate to our system. In this part we need to be careful, mostly because if we give a lot of ram to the system, it might affect our host system and make it slow, or if we give it a small amount of ram memory it might be extremely slow and will not function properly. Now, moving down we will find the "Hard drive" section, here we can choose if we want to use an existing drive, create a new one or just not use a drive at all. If you click down where it says "Show descriptions" it will change the interface and it will show descriptions of each thing separately. 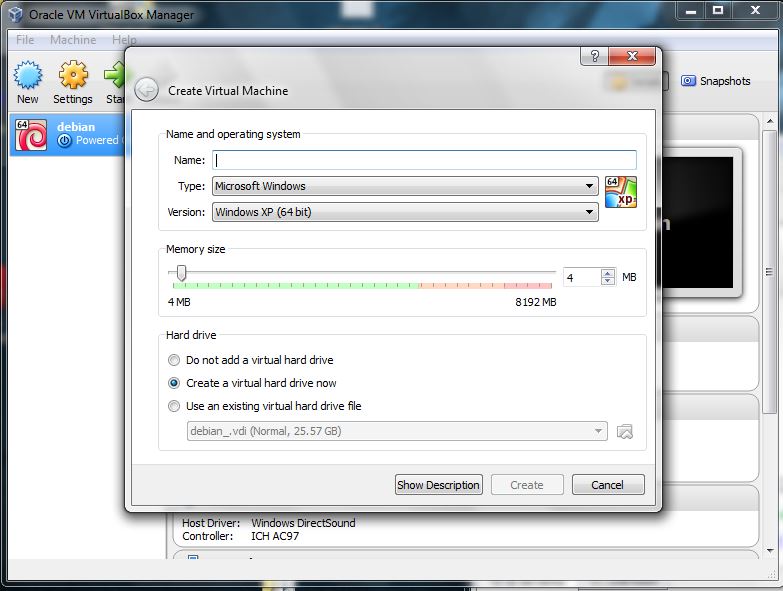
For the sake of this tutorial, we will name the virtual machine "Ubuntu", because that is the distribution that we will be using. VirtualBox will automatically choose the type and version of the operating system that we will be installing, if you want you can change it, for some distributions it might be wrong though. Now here its where it might get a little weird, we need to select memory size. Depending on the amount of ram that you have, VirtualBox will tell you how much ram you can allocate to your virtual machine. In my case, my desktop has 8GB of ram, so I decided to assign 2-4GB because It won't affect my host computer, and it is located in a safe range of usage. VirtualBox gives you a visual representation of how much ram will be safe to allocate to your virtual machine, which is shown with that green bar, anywhere inside of it should be safe, yellow might be safe, red is not safe. If you have a 4GB of ram in your system, about 1.5GB should be alright. In the Hard Drive section we want to leave it as it is, because we want to create a new drive. Usually you want to create new drives to keep each operating system isolated from each other. When you are done, you can click "Create". 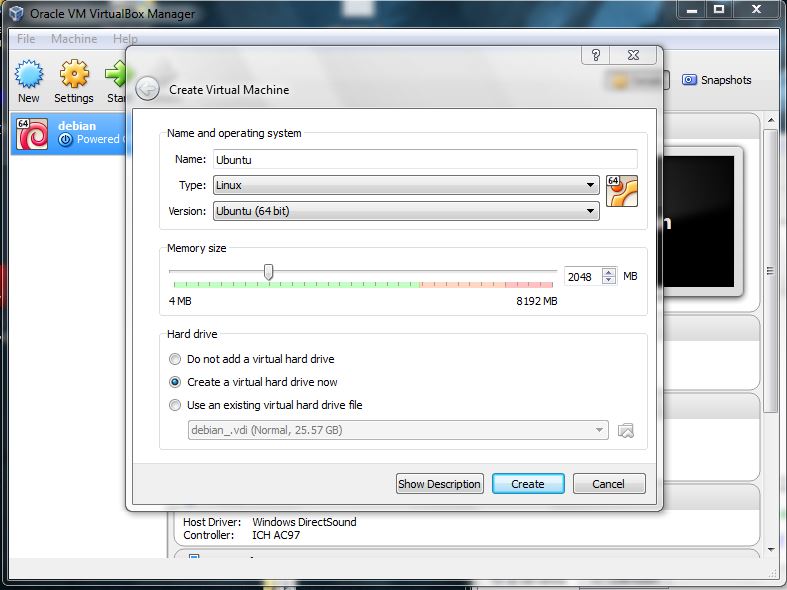
Creating the storage for the virtual machine When you click create, you will get to the "Create Virtual Hard Drive" window, here we will be specifying some information related to the creating of the virtual hard drive that the operating system will be in. In the first field, named "File location" we will be leaving it as it is, since we don't have to mess with it. In the field that says "File size" we need to specify how big we want this hard drive to be. Depending on the operating system, it will require more or less space depending on the minimum requirements set by it. I believe that the minimum requirements for Ubuntu are 8GB. I will recommend to set it to be at least 20GB or up. In the Hard drive file type you can leave it as it is, since it is default of VirtualBox. In the "Storage on physical hard drive" section, we will choose "Dynamically allocated", because it will only consume the space that we are using, rather than taking a chunk of our space and using it for the system itself. Here its the definitions provided by it about these two types of storage, it is important for you to know their meaning: -Dynamically allocated hard drive files will only use space on your physical hard drive as it fill us (up to the maximum fixed size), although it will not shrink again automatically when space is freed. -Fixed size hard drive file may take longer to create on some systems but is often faster to use. Now we can click create and it will finish the creation of the profile of the virtual machine that we want to create. 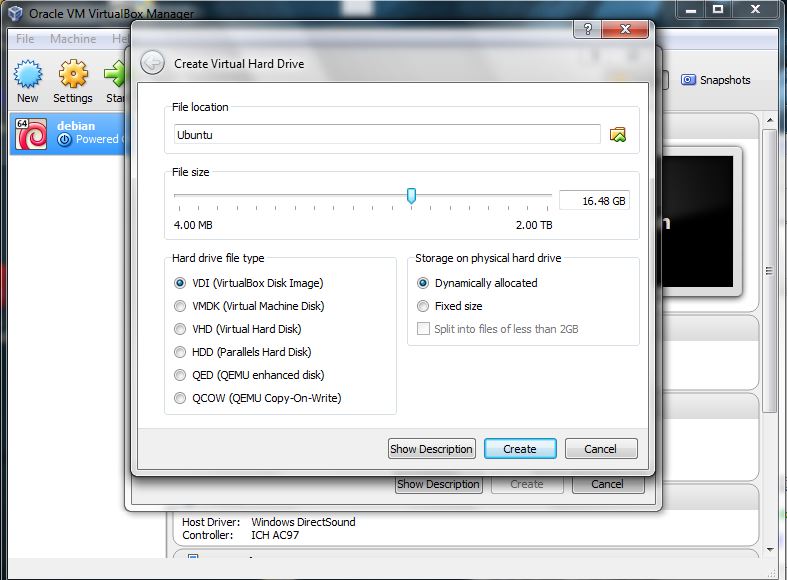
Now we are able to see that the the profile has been created. From here we can either run it by clicking "Start" or go to the "settings" and change some things before we start it up. 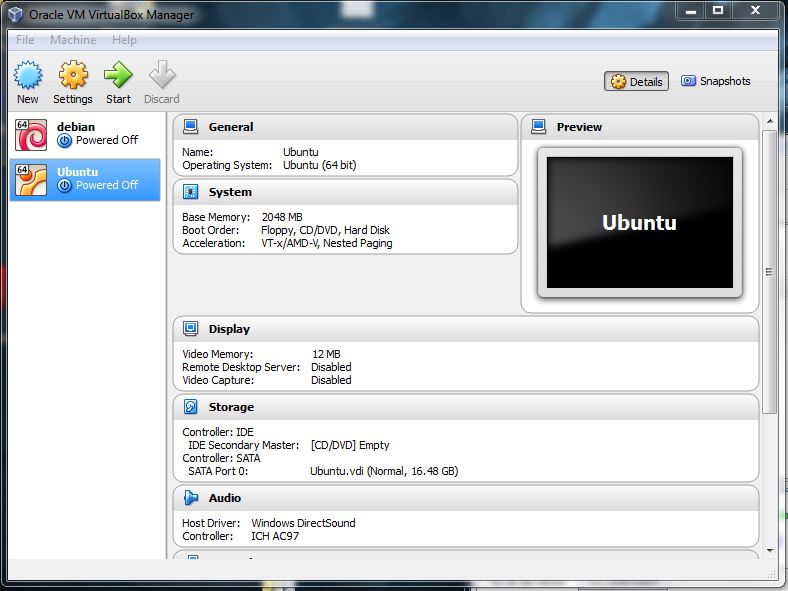
Other changes before booting (optional) This is an optional step, but if you go on the settings of the virtual machine you can change different things before firing it up for the first time. For instance, one setting that I like to change (under System > Processor) is the amount of CPU cores that the virtual machine is allowed to use, for instance, my computer has a shitty dual core processor (don't judge, it gets the work done), I would like it to use both cores in order for it to have more processing power and perform better. 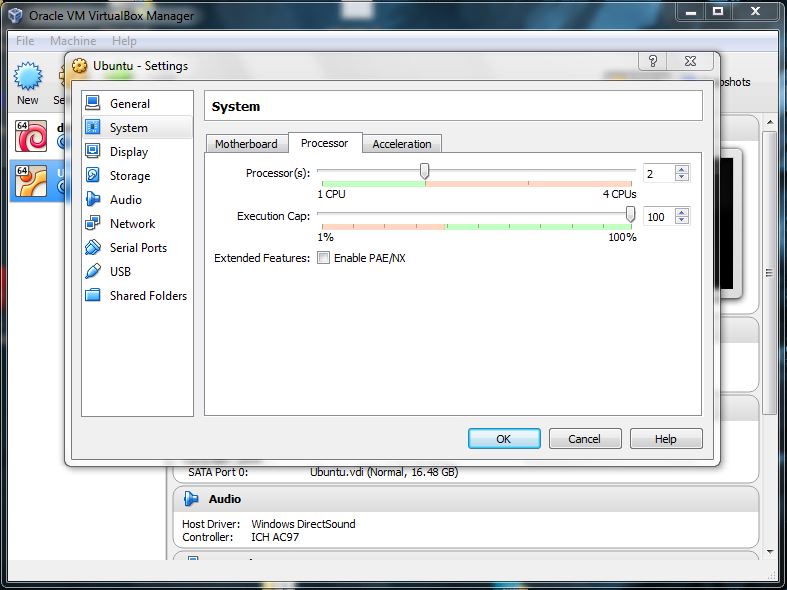
In the video settings (Under Display > Video) I like to increase the amount of video memory given to the virtual machine to the cap. This will allow graphics to perform better overall. (Too bad the cap is 128MB, If I could get it to at least 1GB I could do some decent gaming with a virtual machine). Now, where it says "Extended Features", you can enable 3D and 2D acceleration too. Be aware that you need to enable these after the installation of the operating system has been completed and you need to have installed the "Oracle VM VirtualBox Extension Pack" which can be downloaded from the VirtualBox download page. 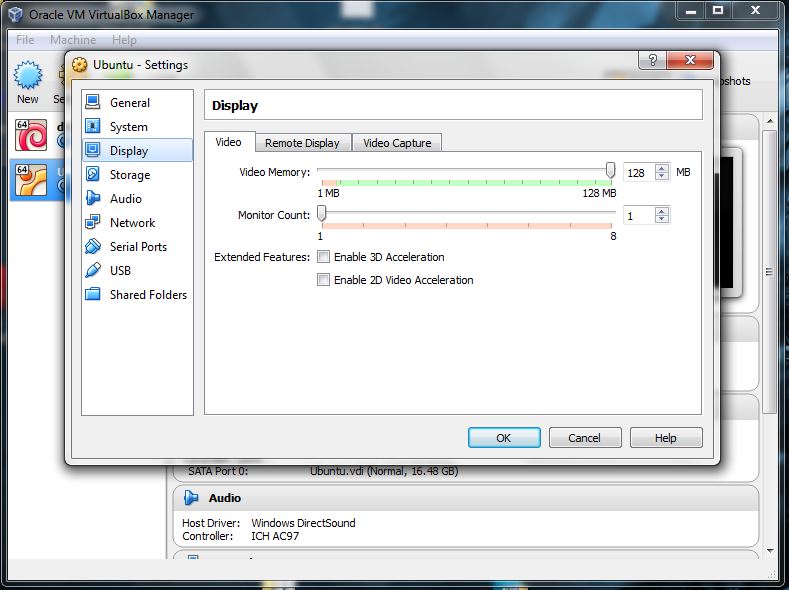
Booting the virtual machine Now that everything is ready, you can select the virtual machine profile and click "Start" and it will launch it, now you need to choose the image that you downloaded before by clicking the little folder with the green arrow. When you click "Start" it will launch and it will boot to the image that you have provided, from there you can follow my other tutorial on how to install Ubuntu 14.04 by clicking here [Click Here] and skip to the part that says "Booting and Installing Ubuntu 14.04". 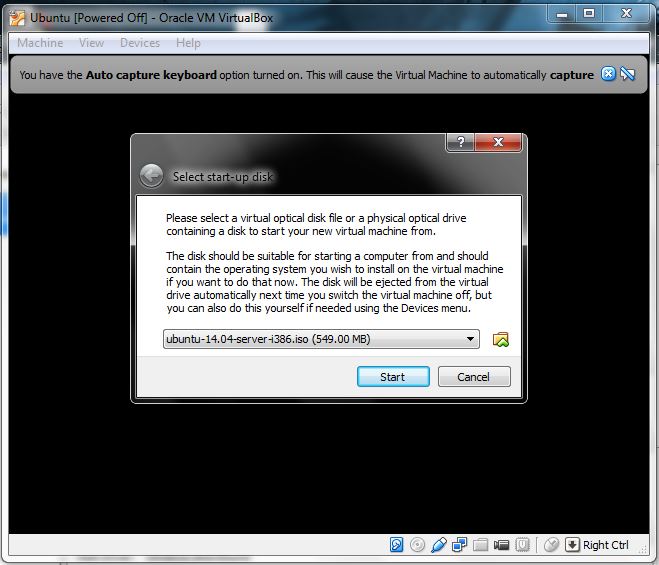
Congratulations, now you know how to set up a virtual machine. Virtual machines can be used for many different purposes, for instance, you can try many different distributions of Linux and test them out to see which one you like and then install it directly to your physical hard drive, I used to do this when I first switched to Linux. Another use for it is to test out shady applications that you think might end up your system or getting you in trouble (not encouraging piracy here). If you have more than one monitor, you can one virtual machine open in one screen and your host system open in another screen, getting the best out of both worlds. Overall Virtual machines can help you a lot in many different occasions and can also improve your computer skills.
Let me know if you liked this post and what else you would like to see in the future, I am open to suggestions. You can always leave a comment in this post or contact me directly with questions or things that you will like me to change or add.
0 Comments
Leave a Reply. |
Angel MercedesElectrical Engineering student and lover of all things Open Source, 3D Printing, Electronics and Linux. Categories
All
Archives
May 2017
|
 RSS Feed
