|
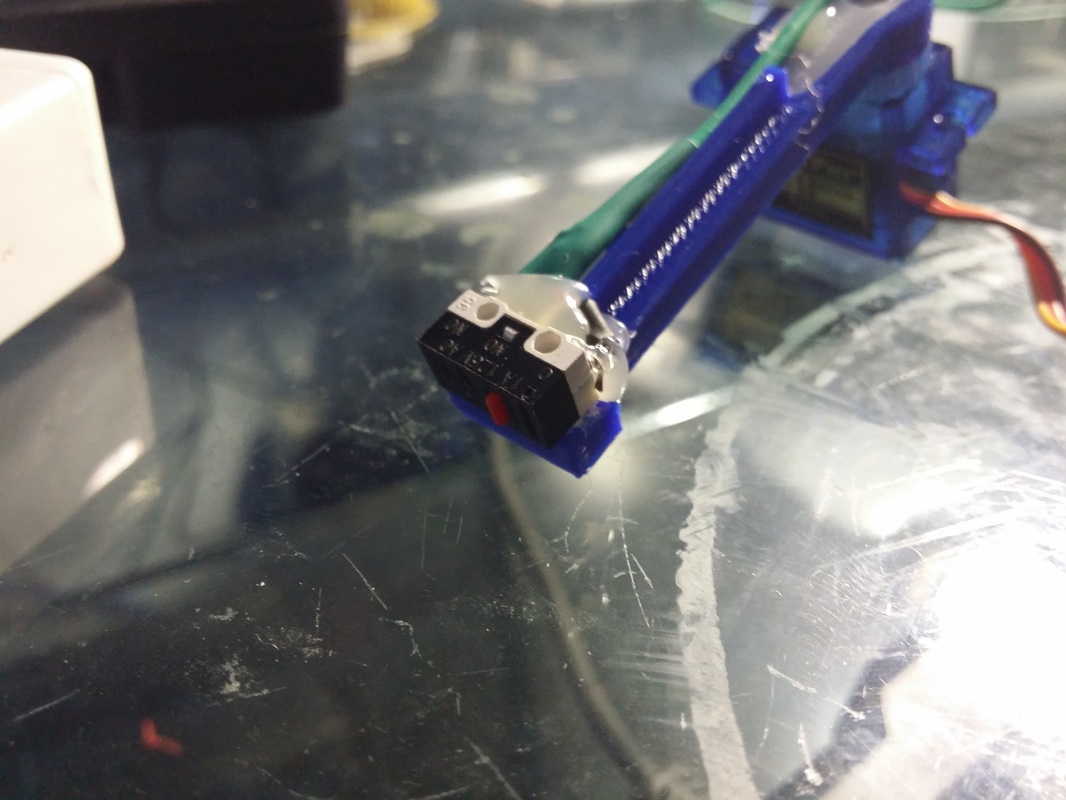
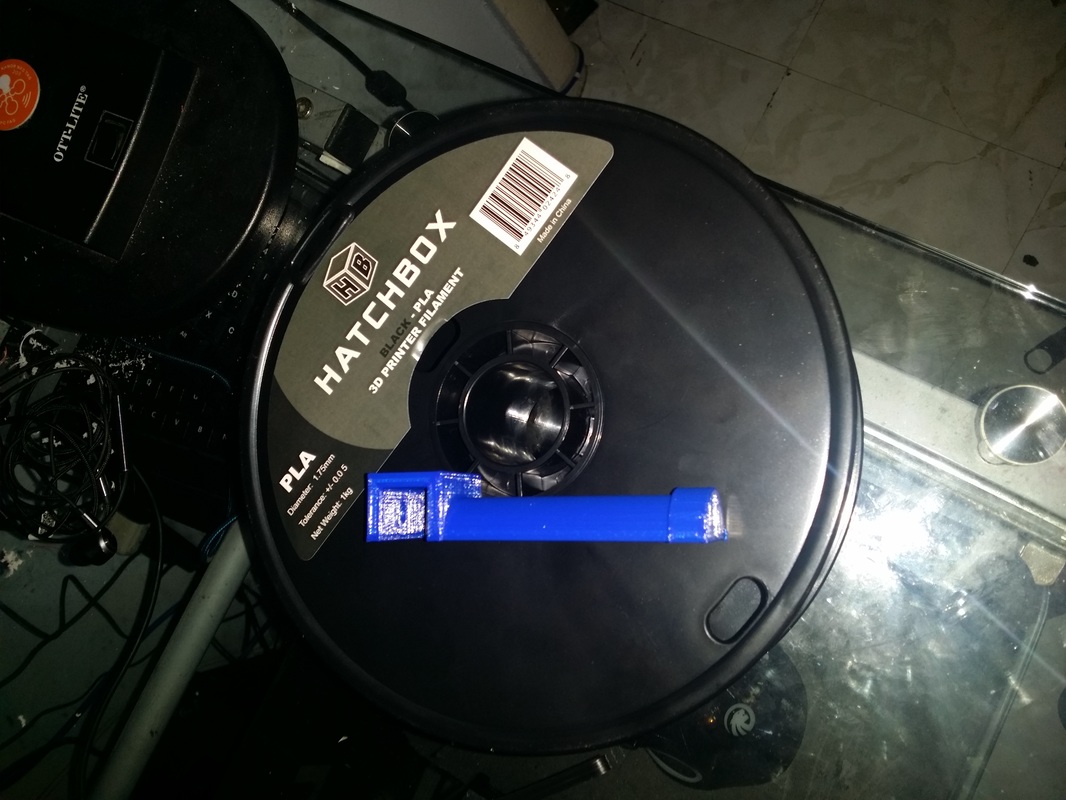
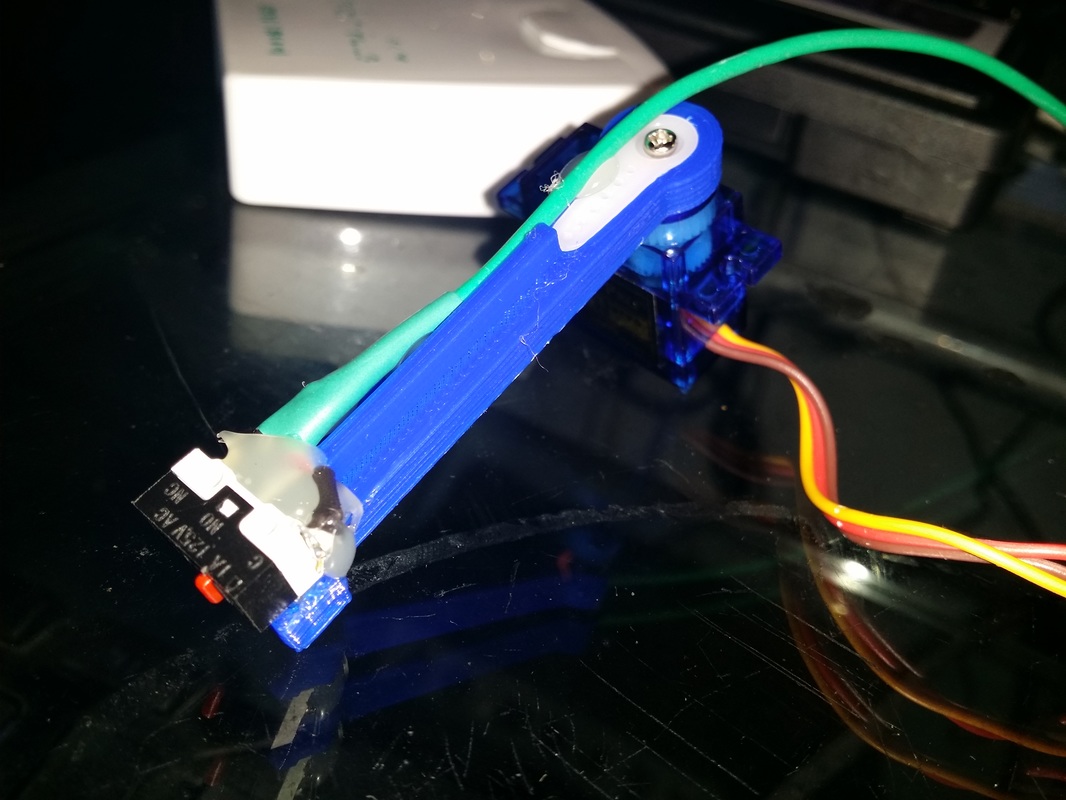
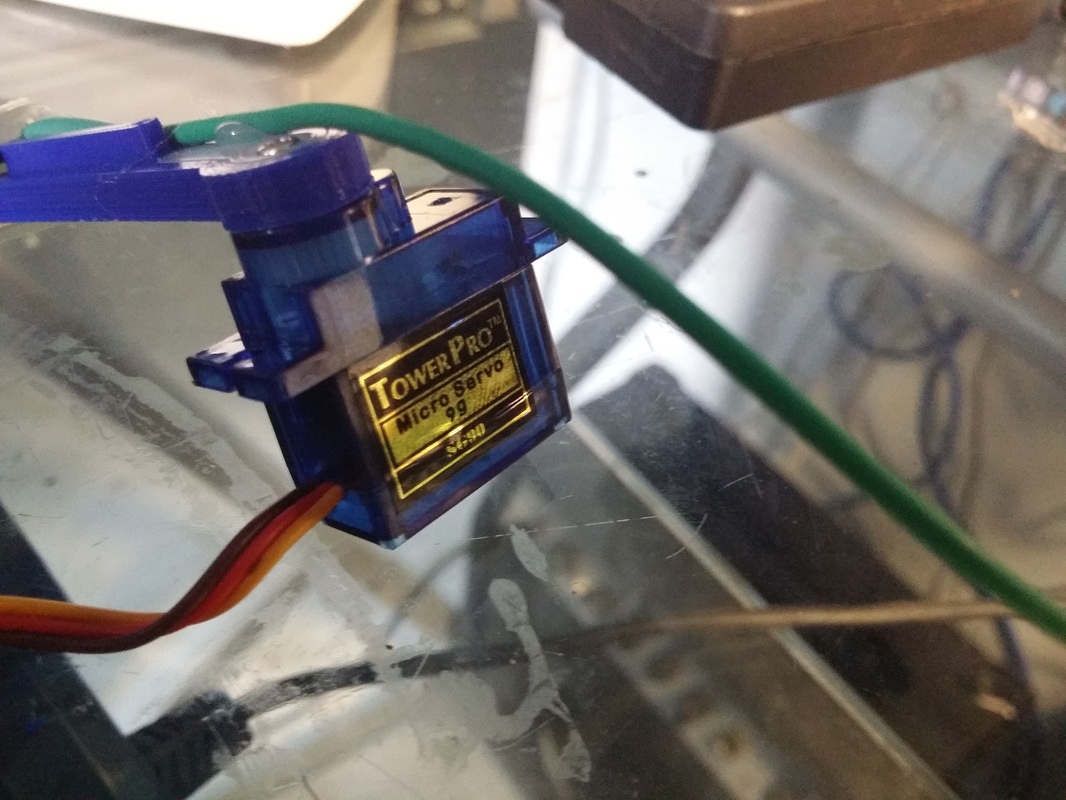
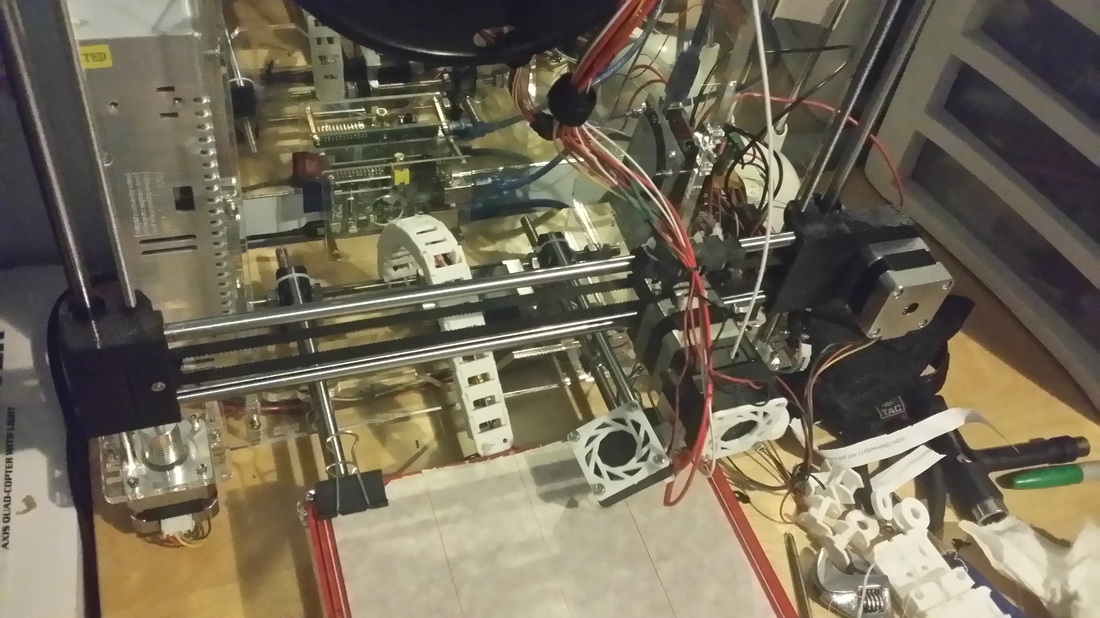
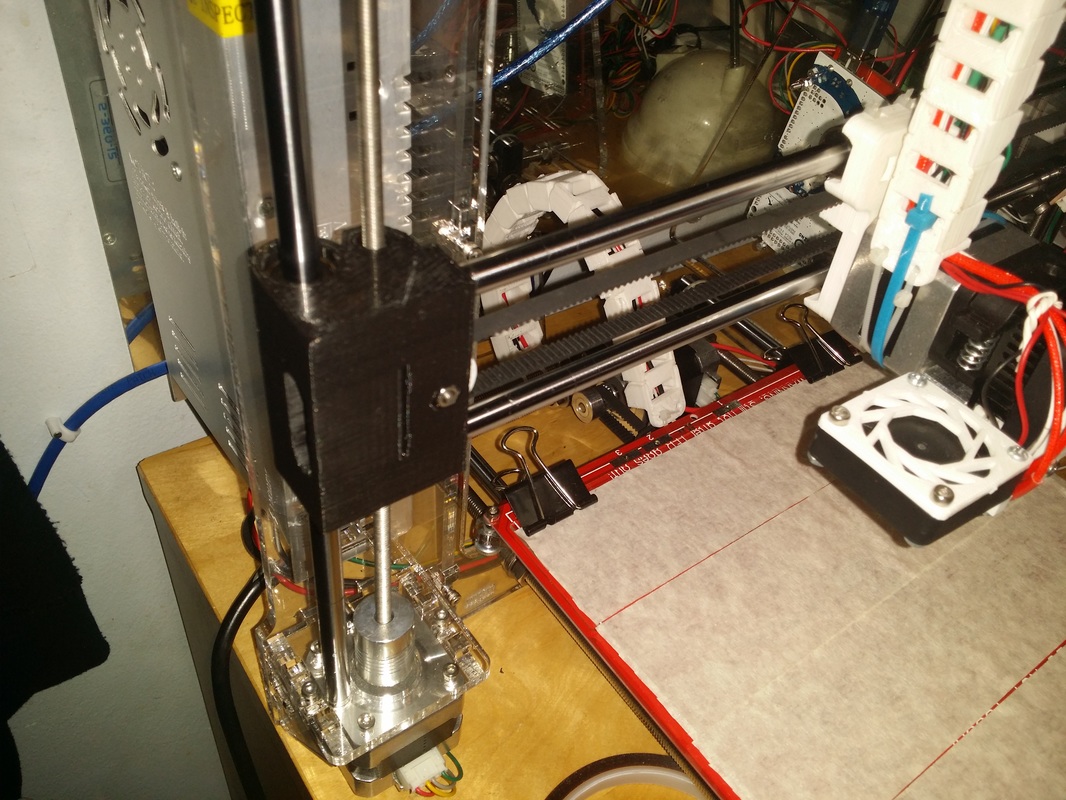
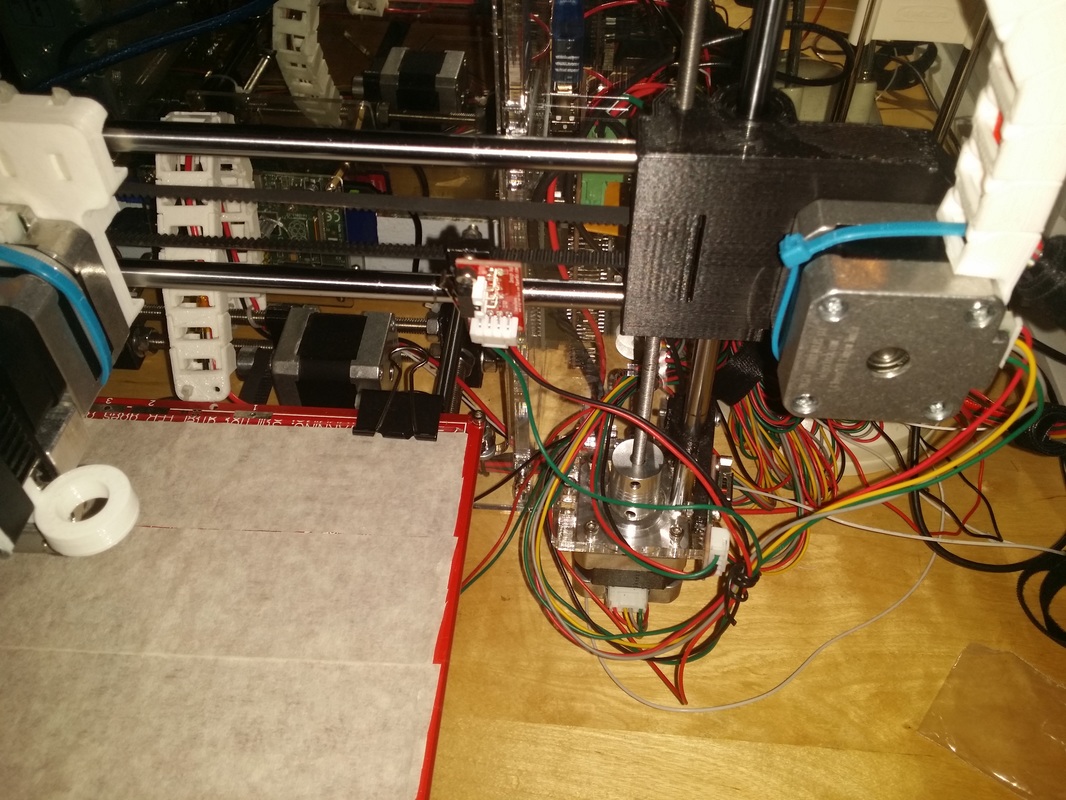
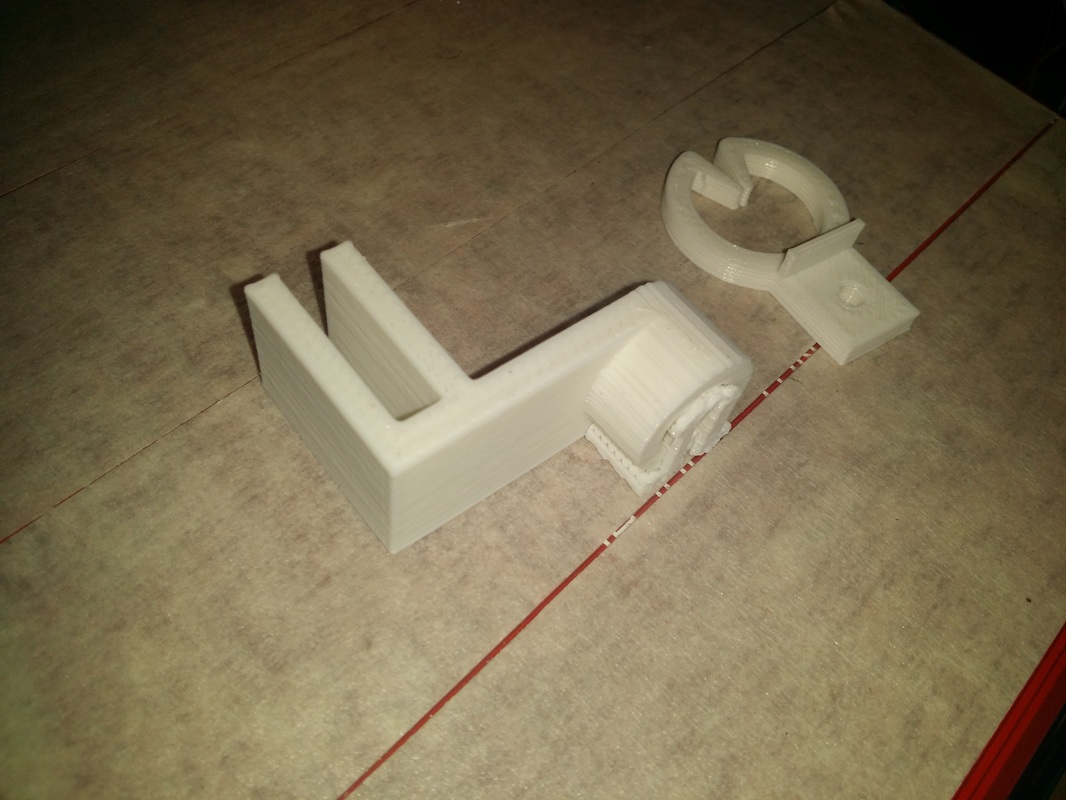
Hello guys, so not long ago I started building this 3d printer. It is based on the Fusebox 3d printer but it is also more rigid and has a lot of different parts, including auto bed levelling. So the parts that it uses are mostly from people on Thingiverse, the Fusebox files, and parts that I have designed myself. The parts that I got off from thingiverse were the bowden extruder, the carrying handles, endstop mounts, the arm for the auto levelling, Z rod coupling, and the Fusebox parts. I will be linking everything at the end of the post. So I ordered the Misumi 1515 extrusions, which are 12x 360mm for all the sides and 4x 400mm for the columns. They were about $30 but they were well worth it. I am using 2x 400mm rods for the Z axis, 2x 390mm for the Y axis and about 2x 265mm for the X axis. I am also using the same motors that come with the Folgertech prusa i3 by default, they are sold by FolgerTech. Also the belts and belt pulleys come from them, as well as the Arduino Mega, Ramps, and stepper drivers. Some of the other parts came from either random sellers on ebay or local stores here in NY. One thing that has been a big challenge is to make the printing bed. I designed it myself and used two sheets of acrylic from home depot. The only problem with that is that acrylic tends to be super bendy even when you have more than one sheet and you add structural support to it. I made 2 3d printed supports and they seem to help but its not enough. I was thinking on going for a straight sheet of wood and using that for the bed but I could not find a good one to do the job. In any case, the design for the carriage that I did seemed to be super solid. What I Would like to use is 4x 1515 Misumu extrusions to make a rectangle where a sheet of glass will lay on. There will be a couple of printed parts that will make sure that the glass will be firmly attached to the extrusions. The fusebox uses something like this but the implementation is not the best. The bending of the bed will not be much of a problem because of the auto bed levelling system. What the auto bed levelling system will do is probe 3 places in the bed, measuring the distance from a 0 point to the place that the switch touches the bed, it does some calculations and even if the bed is bent, the printer will end up compensating for it, that way all the prints will stick well and will be printed straight. I will have that levelling and also have the -Z switch for redundancy. It uses a 9g servo and a switch, which connects directly to the ramps and is configured on the Marlin firmware. Another thing I wanted to discuss is the system that drives the Z axis. It is using a normal nema 17, with a 5mm to 5mm coupler. The Z threaded rod is not actually 5mm, but it is 3/16", which is about 4.7625 mm. This I got at home depot for like $2 with some nuts. It uses the same Prusa system where you have a nut and the rod turns so the nut moves up and down. Luckily the Prusa calculator had a preset for this rod so I was able to calculate the steps per mm for it. The extruder is a bowden extruder, which will push the filament from outside of the printer through a tube to the hotend itself. I might get a new hotend that comes with its own hotend tubing and connectors because my setup is pretty hacked together. The extruder uses a MK7 gear. Printed parts
Fusebox Parts: http://www.thingiverse.com/thing:1047193 Z and Y Holders: https://cad.onshape.com/documents/7f226a017e504ab7b3abe027/w/89b42ab53bb744fdaac9260f/e/c5112f5b92b240e694fe1a15 https://cad.onshape.com/documents/1d2a9881e027409f8c24824d/w/d820a836286742eebfaa664c/e/5b539cb2f3e14352be929242 Bed: https://cad.onshape.com/documents/7f226a017e504ab7b3abe027/w/89b42ab53bb744fdaac9260f/e/c5112f5b92b240e694fe1a15 Endstop Mount: http://www.thingiverse.com/thing:503645 Auto Leveling Arm: http://www.thingiverse.com/thing:1154898 Spool Holder: http://www.thingiverse.com/thing:1151471 Z Coupling: http://www.thingiverse.com/thing:1131838 Handles for 1515 Extrusions: http://www.thingiverse.com/thing:1107453 Bowden Extruder: http://www.thingiverse.com/thing:686008 Mechanical parts: Misumi 1515 Extrusions: http://us.misumi-ec.com/vona2/detail/110300465870/?KWSearch=1515&searchFlow=results2products Motors and drivers: http://www.ebay.com/itm/331084351443?_trksid=p2060353.m2749.l2649&ssPageName=STRK%3AMEBIDX%3AIT http://www.ebay.com/itm/231134847070?_trksid=p2060353.m2749.l2649&ssPageName=STRK%3AMEBIDX%3AIT Belts and pulleys: http://www.ebay.com/itm/330968032415?_trksid=p2060353.m2749.l2649&ssPageName=STRK%3AMEBIDX%3AIT http://www.ebay.com/itm/121738565248?_trksid=p2060353.m2749.l2649&ssPageName=STRK%3AMEBIDX%3AIT Bearings: http://www.ebay.com/itm/252141607390?_trksid=p2060353.m2749.l2649&ssPageName=STRK%3AMEBIDX%3AIT I missed some of the parts, mostly because they are not on sale or I would recommend to buy them. Anyways I hope you guys have a good day and if you are reading today, Happy Thanksgiving! Hey guys, so not long ago I got the Rwatch M26 from GearBest (http://www.gearbest.com/sports-led-watches/pp_41652.html) and for some reason the app for this Smart Watch was absurdly hard to acquire. Their instructions will point you to one site, while the GearBest ones will point you to another. Not only that, but some sites will download extremely slow, while others will not download at all. So, I have decided to store the apps and share them from my Google Drive. If anyone wants to download them, the link is right here:
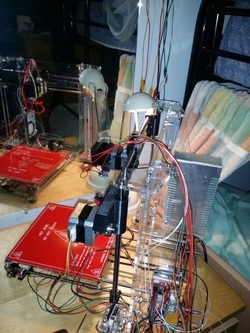
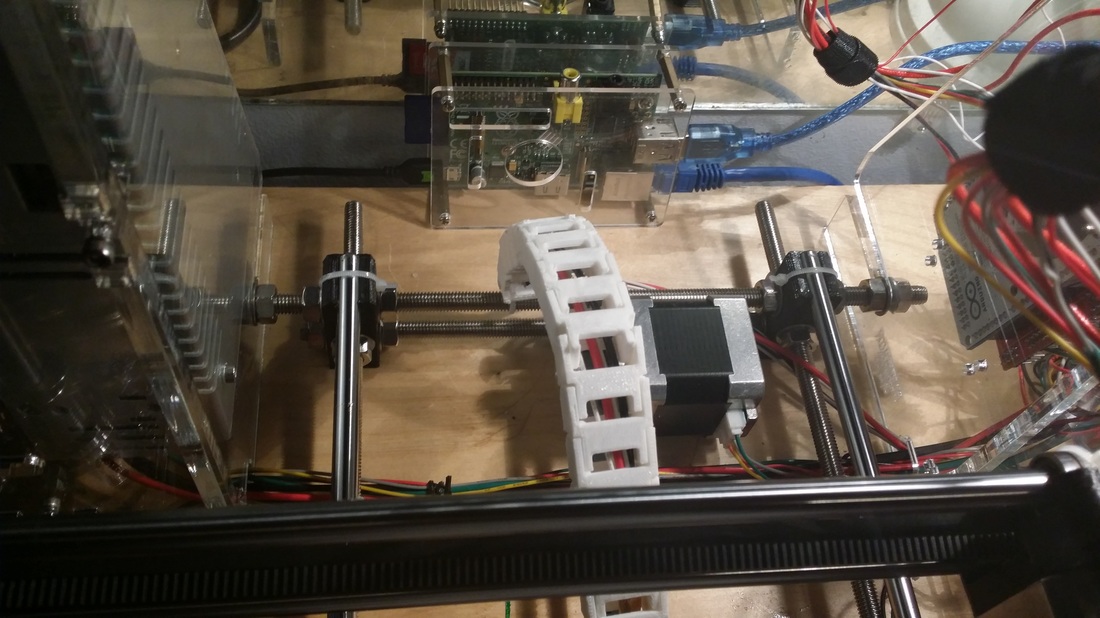
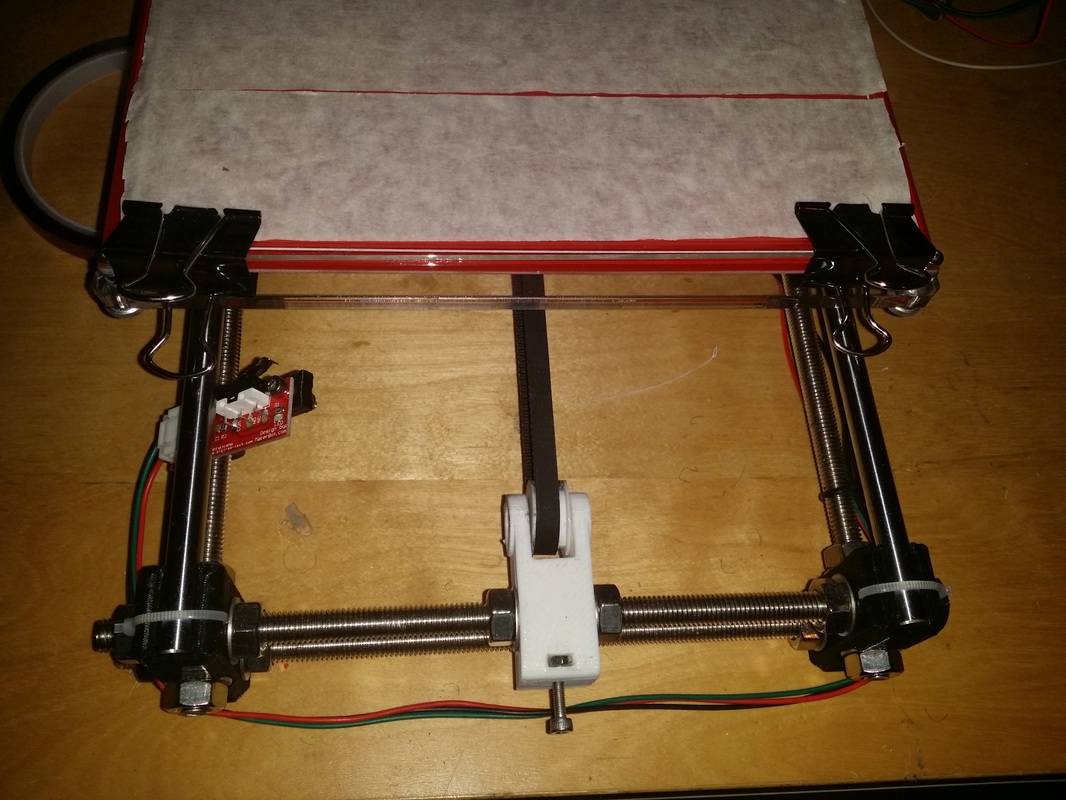
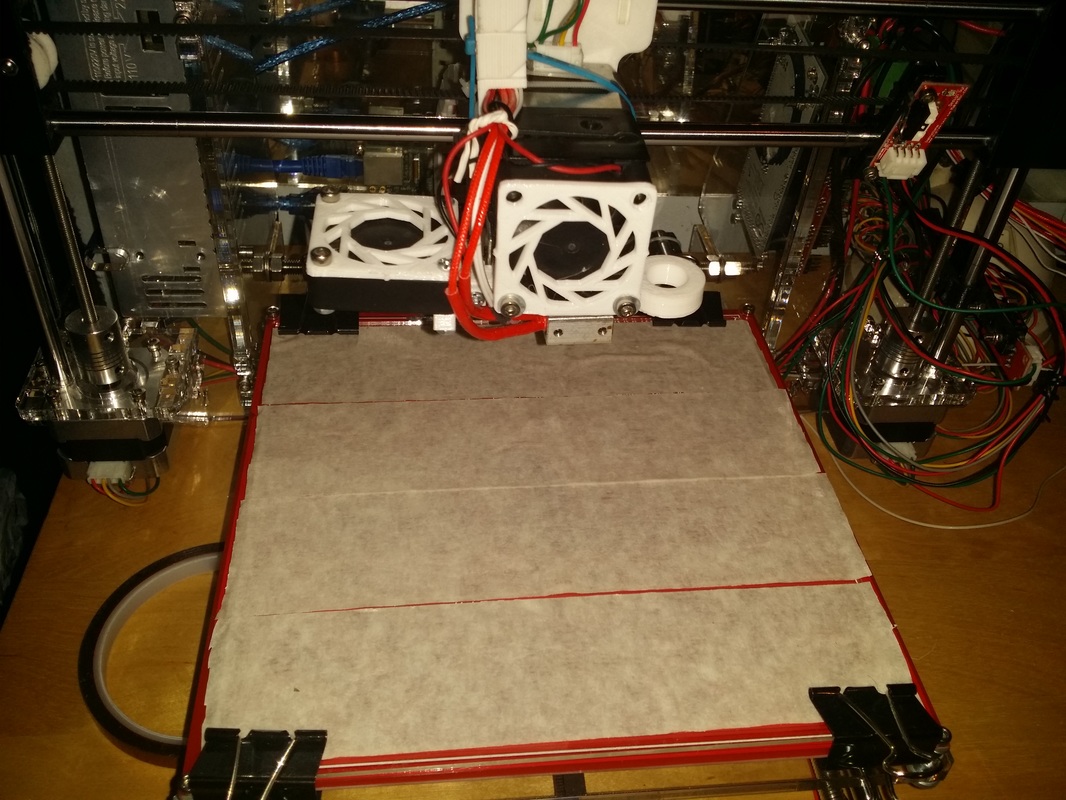
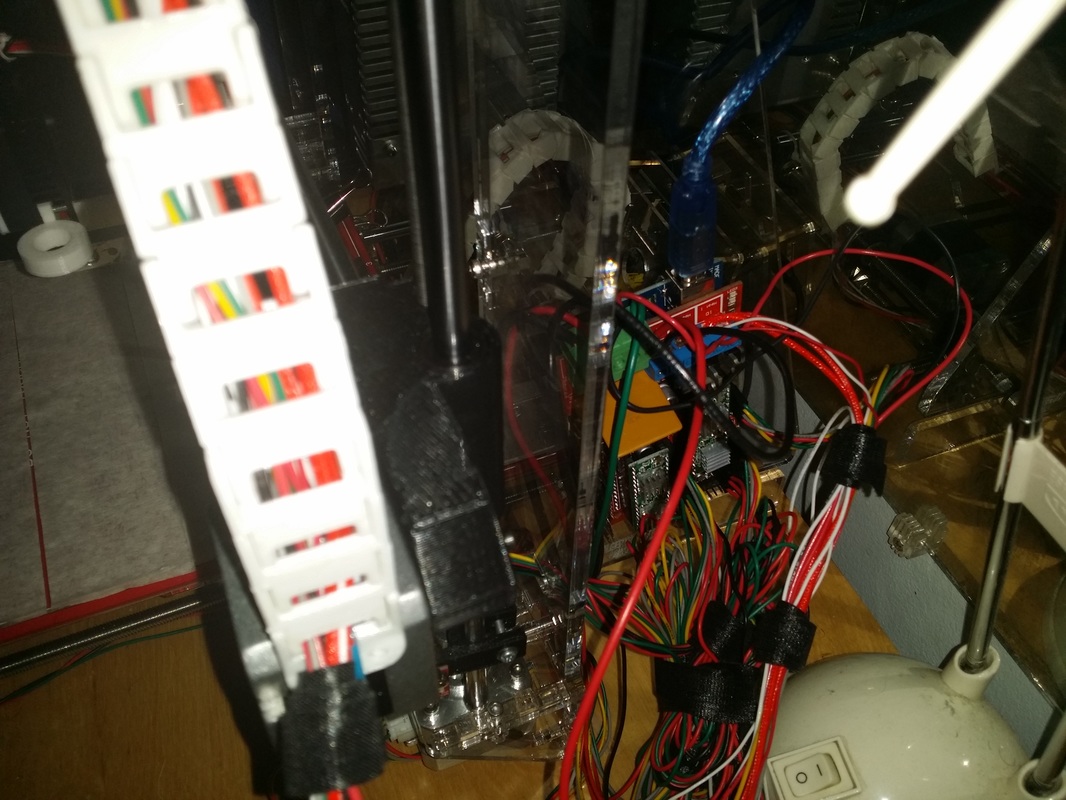
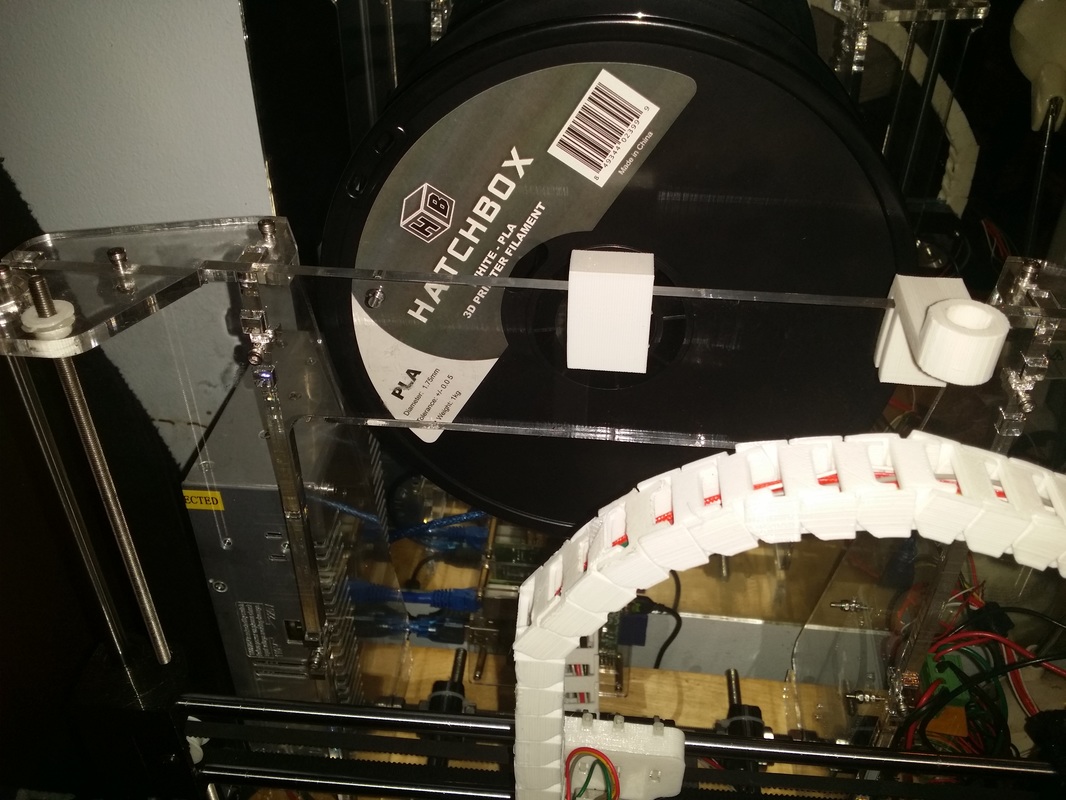
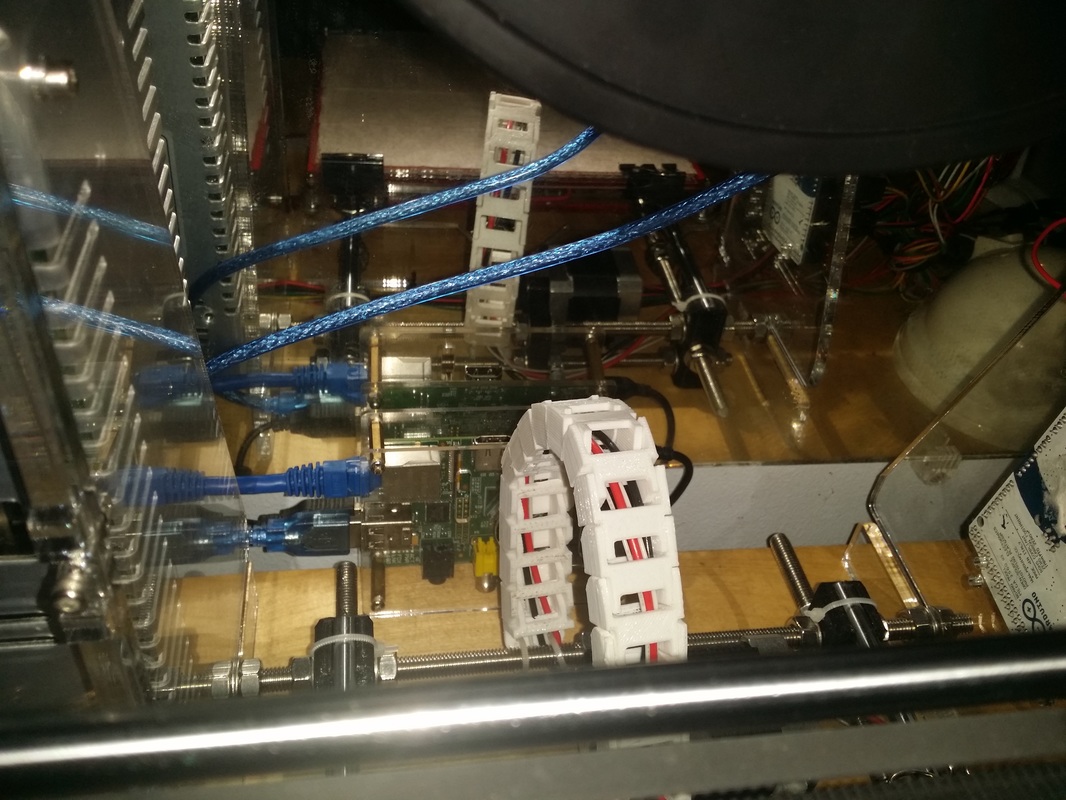
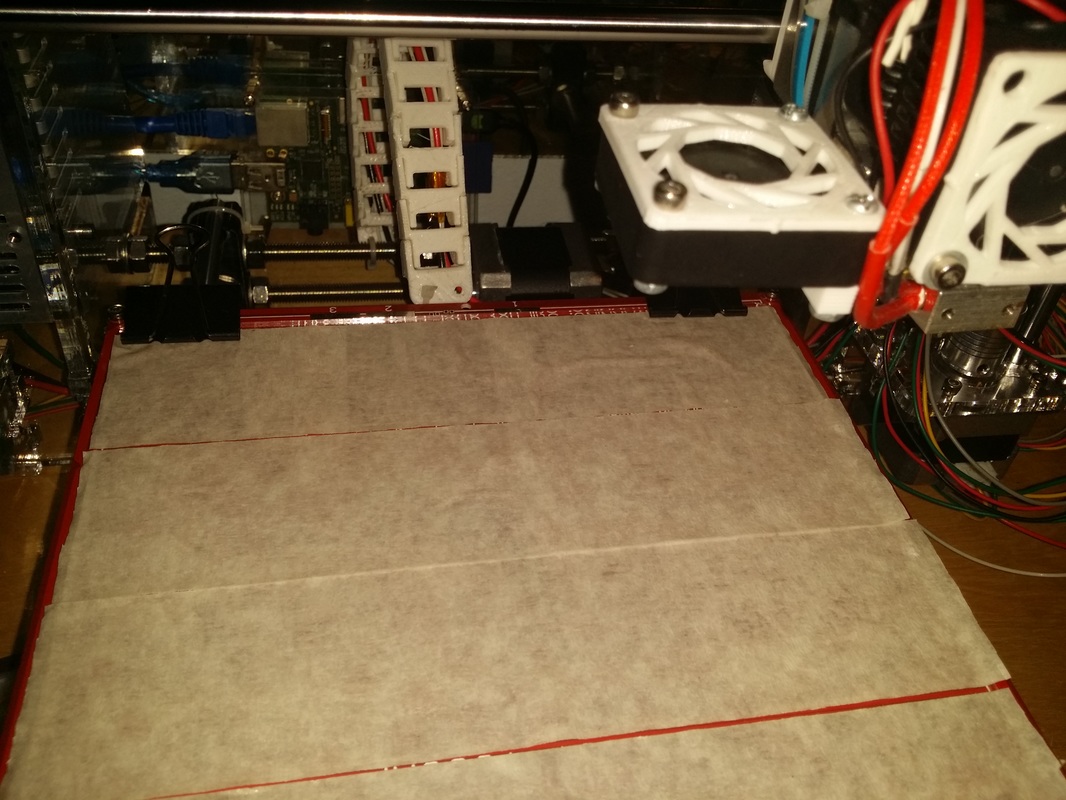
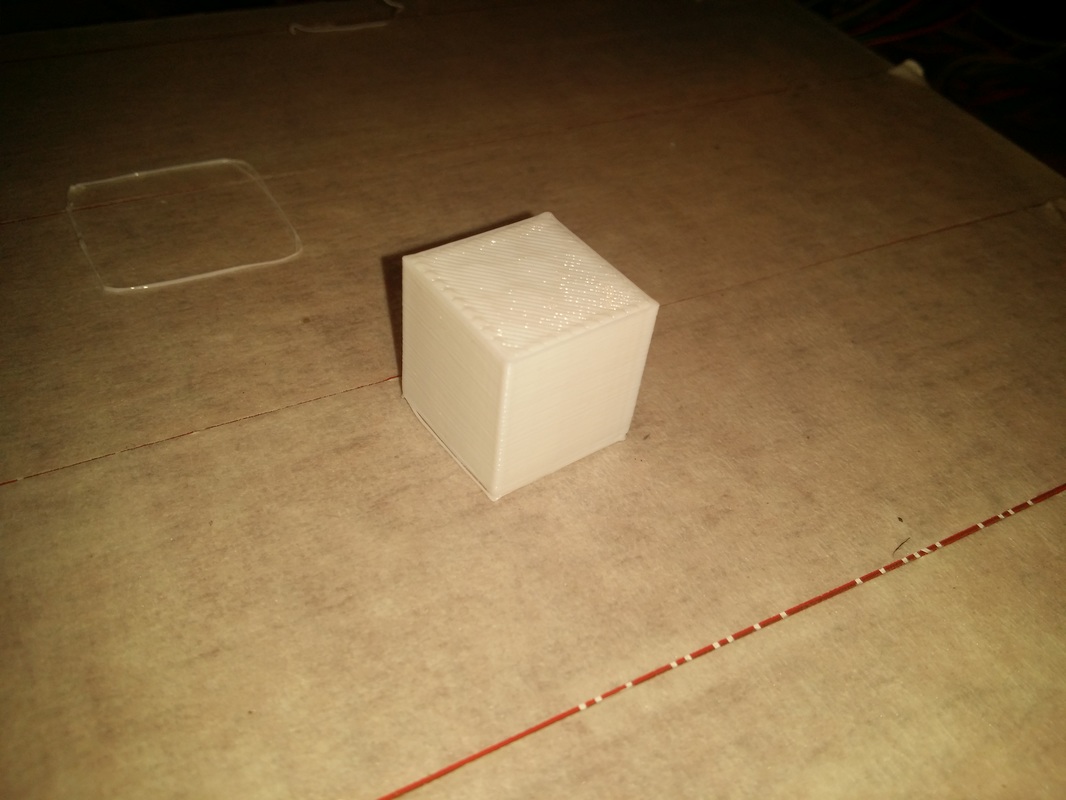
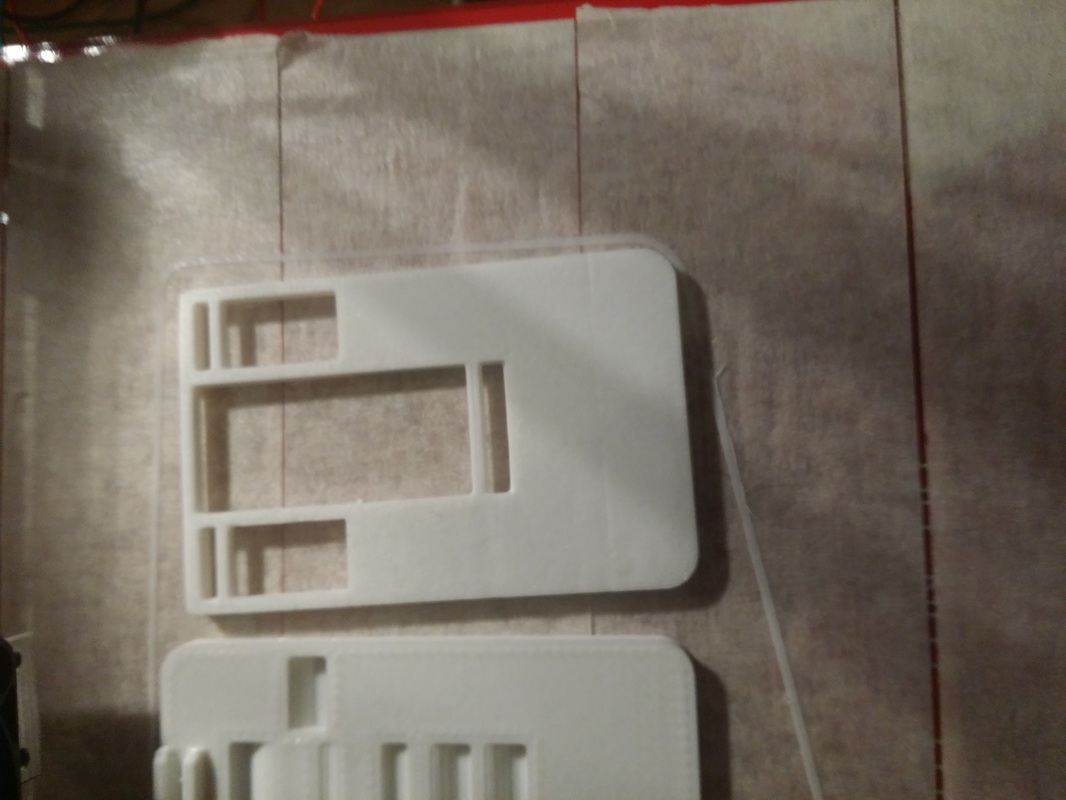
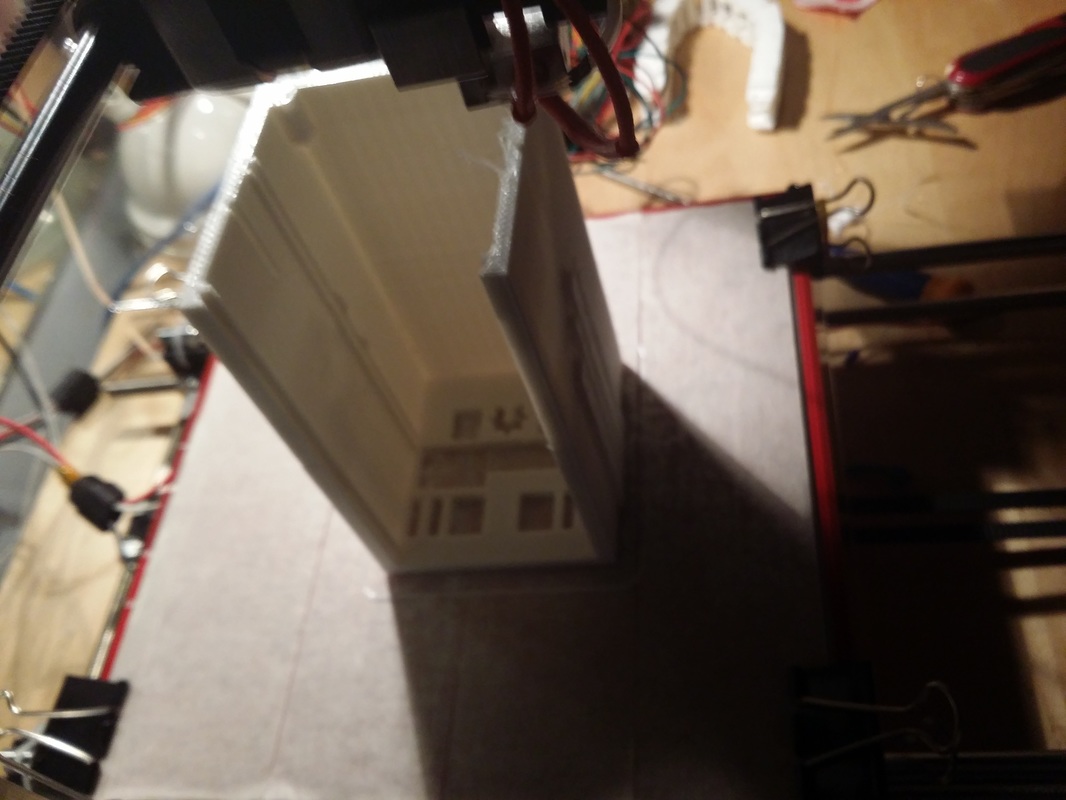
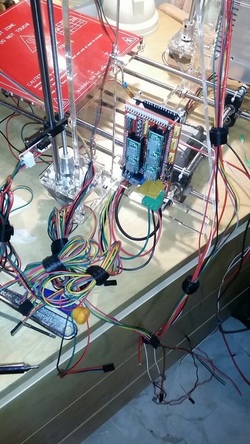
https://drive.google.com/folderview?id=0B1eiL84h1v1XYXBoeElBak5yTGM&usp=sharing Good luck, and If you have any questions about the watch, please post them below. Hello guys! So yesterday I had the priviledge of attending MakerFaire World 2015 here in the city of New York and it was just amazing. So many Makers in one spot, so many friendly people and so many projects. I was able to meet so many wonderful folks and their amazing projects that maybe I could have not been able to get in touch with just being online. A lot of the 3D printing related projects were great too, I have never had so many conversations with so many random people that ended up becoming my friends, it felt more like going to family reunion than going to an exposition. I will leave here the pictures that I took over there. Hell guys, so this is the second update in this adventure and man, my printer has been printing nonstop. It has been easily more than 100 hours during the past two weeks. Anyways just wanted to share some progress pictures since the frame is almost done. Hello guys, this is my first update of the building of my new Dollo 3D printer. This 3D printer has a fully 3D printed frame which can be expanded and modified at will. All the parts can be attached to each other without the need of screws (other than some moving parts) and the only thing you will have to buy is the hotend, electronics such as stepper motors, controlling board, endstops, etc. One can easily modify the size of the printer by just adding more extensions and racks if needed. For more information about he printer visit: http://www.instructables.com/id/Dollo-3D/ https://github.com/benbeezy/Dollo http://3dprint.com/63229/dollo-3d-printer-prints-itself/ Anyways, today is September 23rd and so far I am missing 7 extensions for the frame, 2 for the Y axis, the racks where the motors will go on, 5 motor mounts, endstop and the full Z axis. I am missing most of the moving parts of the printer, but the parts that take more printing time and filament are the extensions and corners. The first parts I printed were all the corners, those took about 4 hours each, then I started printing the extensions which are pretty much the parts that take the most filament and most that I need. I must admit, my printer is 2x the size of the original dollo. I tend to measure the size of the dollos in terms of the amount of extensions used. For instance, the original dollo is 1 extension long, 1 wide and 1 tall. Mines is 2x2x2. This means that I will have to print the double of the parts of the frame. The good thing about this is that the bed of the printer will be much bigger than the one that my current printer has, although I have no need for an extremely big bed either but seems like a good thing to try out. If I feel that the printer seems too small on the Z axis, I can also add 4 more extensions and make the printer taller. For me what I think will be more challenging will be to make the printing bed. For the most part, that Z axis is still on the works because there are some issues to be ironed out on that case. If that is not fixed soon enough, I am not sure what I will do in that matter, but knowing the developer (Benjamin Thomas Engel), I am sure he will work the issues out. We were talking about him making a bowden extruder that attaches to the frame of the printer. Anyways guys, this is my first update about the printer, maybe next one will be after I finish building the frame or most of it.  Hello everyone, I just want to start off by saying that I was not paid to write this review of anything of that sort, what I will be talking about here based on my experience with this printer in comparison with the QU-DB OneUp that I owned before. With that out of the way, lets get started. I ordered the printed for $279.99 plus shipping at the end of June (2015) and it arrived about a week after I ordered it, it took longer to arrive mostly because of issues with the post office delivering the package to the wrong person and keeping me in a limbo about it for a while. I ended up assembling it in about two to three days, and it took a little more solving some problems which I will talk about later. I felt the assembly was pretty smooth to be honest, although some of the instructions could be improved with the amount of details. There more than once the occasions that I found myself googling things related to assembly, and asking questions on groups. Lets get to the printer itself. The printer is a Prusa i3, so if you are familiar with any of the prusa designs you know that they are very modifiable and expandable. With the printer you get a link to a Google Drive folder where you can find most of the information related to the printer, such as assembly instructions, code and software instructions, pictures of the printer, diagrams of wiring, and also the STL printable files of each of the 3D printed parts of the printer itself. "Why would I need those parts?" you ask, well, since the Prusa is fully open, you can take the parts and print them or modify them to suit your needs better. Not only that, but if you end up printing a set of the 3D printed parts, if anything goes completely wrong, you can replace them quickly. I ended up reprinting some of the parts for the printer to be quieter and stronger. The kit comes with everything you will need for the assembly of the printer (and also spare screws, nuts and bearings), the only thing that you actually need to buy separelty is the piece of 8x8 inches window glass, and some painters tape for it. Painters tape is optional and only used to print PLA with, but it has saved me more than once from ruining the nozzle of the hotend or damaging the glass. I got the glass from a local shop for about $3. If you want, you can get 2 or 3 pieces of the glass, This so you can unclamp after a print is done and use another piece of glass right away, or for printing different materials. It took me like 3 days to assemble it, mostly because I had no experience with the printer and the electronics itself, the OneUp had different electronics that were a little bit simpler. In any case, I felt the build was pretty smooth, I did not end up hiting any issues that will stop me from using the printer. If you can find a friend or person that can help you while building it, you could easily finish it in one day of work. The only thing I think a person might find challenging is the fact that you have to solder the heated bed cables, but since I like soldering it was no problem for me. Be sure to read properly the instructions when you get to that part, because you will have to jump a wire between the two pads in order for it to work properly. Another thing to be careful about is the endstops, do wire them correctly, or they will end up frying your electronics. Wrong wired endstops are pretty scary. Here its what happened to me while building my Prusa, after I was done building and testing, my endstop were saying that they were open when they were actually closed, pretty much they were acting as if they were inverse. I tried flipping the connector and nothing worked after that. Every single time I will connect the Ramps to the Arduino mega, it will not turn on at all, but the Mega by itself will. I though I had fried my Mega (Which I almost did, well fried the power regulator), but in fact the Ramps was the one broken and I did not know. I order the new Mega, same thing happens, then I decide to order a new Ramps and everything works well. I still have the older Mega which I might end up using for another printer build or something. anyways tl;dr check you wiring or you will fry your electronics. Now I will discuss some of the positive and negative things that I have found in the printer, and how does it compare to the oneUP. Positive things: 1). Very quiet if built right: In comparison to the OneUp, this printer is way more quiet, even being bigger, and having more moving parts. The first thing that amazed me is how quiet and smooth the movements were when moving it, the OneUp will be so small yet so loud, I could not print with it while someone was asleep because of it. With more tweaking, you can make your printer extremely quiet as well. For the most part, most of the noise in it comes from the belt holders rolling and some of the bearings. 2). Does not vibrate a lot: Vibration was also really bad on the OneUp too. Sometimes, It will vibrate so much during printing that it will almost fall of the table where I had it in. That is not the case with this printer, it is awful stable and will not move an inch, even after printing for hours and hours. 3). Printing quality is pretty good: I was amazed at the first print I did with the printer and how well it came out. The quality was amazing without much tweaking. In the OneUp the quality was pretty terrible, mostly because it was not as accurate or stable. The way that the extruder is built, which is a custom one made by FolgerTech also helps. I have yet to have weird issues while printing, other than when the print is extremely hard to print without support material. 4). Fully open: The printer is completely open source, you can change whatever you want and do whatever you want to it. You can also find a lot of modifications to do to it online. I have seen people turn Prusas into small CNC machines and laser engravers. I will be including down below some things to print first in order to make your experience smoother. 5). 0 clogs or jams so far: Thanks to having an awersome extruder, and using good filament, I have had no issues with clogs and jams. For the most part I buy Hatchbox filament from amazon and it is pretty good quality and melts really well. Jams are something extremely annoying to deal with, and something that can completely ruin your whole day. Jams mostly happen when the extruder is bad, or the filament is bad or dirty. A lot of Chinese filament sold on Ebay is pretty bad, and can completely damage your extruder. Stick well known filament producers like Hatchbox and other companies. Check reviews, see what people say about them. 6). Arduino Mega + Ramps: Having an Arduino Mega and Ramps board is the cheapest and best way to go when building a printer. It makes troubleshooting super easy too because of the amount of documentation out there. The good thing about them is that they are very inexpensive compared to other boards such as the rambo (which can be about $120), you can grab the whole board for about $35 on ebay, and if you want, you can even add an LCD in order to not have to print with your computer attached to your printer. I think it is a very smart choice. 7). Build volume: Compared with the 4x4 inches build area of the OneUp, the FolgerTech Prusa feels massive. You will end up being able to print most of the things out there without having any issues in terms of volume. Pretty much most filaments also stick to the glass platform very nicely too. 8). Price: At $280 plus shipping, it is a complete no brainer, when Printers that are $100+ don't even include a heated bed. The OneUp (that piece of crap) is about the same price with a heated bed included! I completely recommend this printer for anyone looking to start into 3D printing, but without spending too much money. I think by far it is the best printer in the market at that price. Negative things: These problems can be easily fixed with a little bit of work, and also some re-printing, but are also things that they could change in order to make the printer itself better. 1). The printed part quality: I had the issue that was that some of the parts will not fit properly and I will end up doing a lot of sanding in order to get them to fit well enough. Not only that, but the quality seemed a little bit off, as if the parts had been printed too fast. I understand since it is kinda hard to print with ABS, and I can also reprint the parts. 2). Issues in the code: I ended up finding a lot of issues in the code too. The most notorious one was one which will end up flipping the logic of my endstop and making them think they were being pressed when they were not. It took quite a bit of research in order to find the solution for that issue. 3). Flipped X motors: For some reason, the motor in the X axis is at the opposite direction, when compared to a normal Prusa i3, in order for you to fix this problem, you need to flip the motor connector in the ramps for it to move in the right direction. I did this with software and ended up mirroring every single print of mines when I was trying to print anything that was not symetrical. 4). No Y axis bearing holders: At least in my kit, the bearing holders for the Y axis did not come in the package. It is not a big deal, but it very nice to have them because they make troubleshooting the Y axis way easier, and you do not end up having to break the zipties in them. 5). Cable management: Cable management can be a nightmare if you don't have a way of doing it. I would love to see the kit include some velctro ties in order tie up the cables together. I had to get some of those in order to get a neat management and for the wires to not get caught up on anything. You can even get away with using electrical tape. My recommendations: 1. Use high quality known filament with good reviews. 2. Find a buddy to help you assemble the printer faster. 3. Organize your cables as much as you can. 4. Find printable upgrades in order to make the printer better. 5. Print a set of printable parts just in case. 6. Make sure everything is working properly before your first print. 7. Level your bed and Z axis properly 8. Always save your Marlin code whenever you modify it. 9. Do not overtighten the screws in the acrylic frame or you might end up cracking it. Printable upgrades: These are things that I suggest you print, because they will make your life way better. 1. Spool holder: Very good spool holder, handles all the spools I throw to it. I have heard that some people have had issues with way bigger spools so be mindful of that. Hatchbox spools tend to fit well. You can use a pencil or a threaded rod to place your spool on it. Link: http://www.thingiverse.com/thing:177687 2. Filament guide and filter: Very useful, It guides the filament to where it has to go from the spool and also cleans it at the same time. Having clean filament helps a lot if you are having jams. Link: http://www.thingiverse.com/thing:215067 3. Cable organizer: This is more of a cable guide for the extruder cables. It allows for them not to be moving around and getting on the way. Link: http://www.thingiverse.com/thing:571645 4. Z rods stabilizer: Another super helpful thing. What this does is to not allow the Z threaded rods to be wobbling around. Link: http://www.thingiverse.com/thing:785795 5. Cable chains: These are good for keeping cables nicely organized too. You place the cables inside of these and give it enough slack and they won't be all over the place, however it takes a lot of printing and effort to get them on. Link: http://www.thingiverse.com/thing:40124 6. Idler with belt tensioning: This one is a very good idler that allows your to change the tensioning of your Y belt. Link: http://www.thingiverse.com/thing:320268 Videos that I have made: Hello guys, I received and built my Prusa I3 a little while ago. Even though it was a long process, I feel like I did it fairly quickly and smoother. It took me about 2 days to get it to work, however at the third day I ended up burning the ramps and the Arduino mega because of an endstop problem. I ordered a new mega and ramps and the ramps X axis port has an issue and won't run my printer at all. I am in the process of returning the mega for a working one, but still, I have not been able to print anything after about 2 weeks of building the printer. 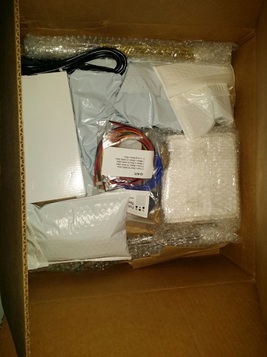 I received the printer after pretty much waiting for it for more than a week. A lot happened to it, it was even lost by the post office at some point. 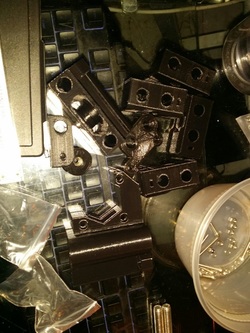 First we have the 3D printed parts. The quality is not the best but they get the job done. Some of them needed sanding because they did not fit properly. 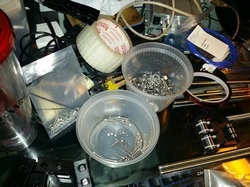 I ended up separating the screws and other parts so it will be easier to work with them. There are a lot of screws and nuts in the kit and each one of them matters a lot.  The acrylic frame is easy to assemble. You have to first attach the Z motors to the acrylic frame. 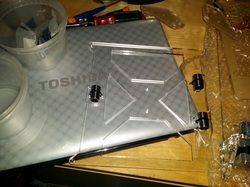 The Y axis base uses 3 linear bearings for it to slide around. Those need to be attached with zipties. 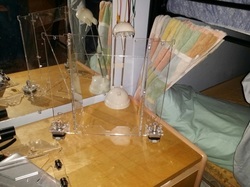 When you add the back parts of the frame, it can kinda stand up by itself, but it can easily fall forward. 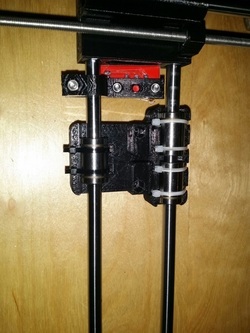 I ziptied the bearings in the extruder part and slid it into the X carriage's smooth rods, then added the two x carriage parts at the sides where the Z rods go through. To the side of it I attached the X max endstop. 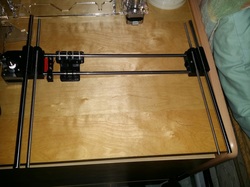 Here its the view of it fully put together. It is missing the belt in the picture. 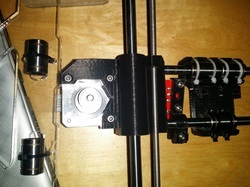 View of the motor that drives the X belt. The belt is not yet attached. 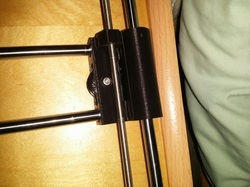 View of the bearing that controls the movement of the X carriage belt. In my machine, the bearing part seems to be really loud when moving from side to side, which I might end up solving by printing the whole part in the picture again. 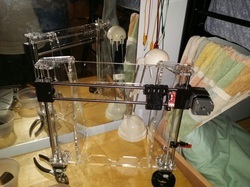 Now here its the X and Z fully assembled with frame and everything.  Here its a shot of the assembled Y axis, it doesn't have the heated bed yet. It needs to be attached to the main frame. 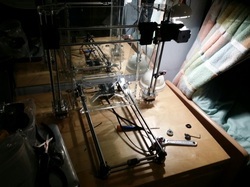 Here its the Y axis attached to the main frame. Now it the frame is nearly completed. 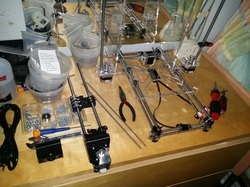 I had to take apart X axis because I did something wrong, although it seemed annoying at the time, it saved so much time later on. I believe I had a motor facing the wrong way and I had to switch it around. 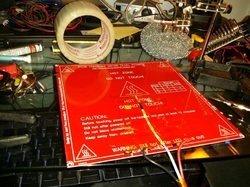 Now to the heated bed. In order to get it to work, you need to solder two wires directly to it and tape the thermistor with kapton tape to the bottom of the bed. There needs to be also a big enough jumper between two of the soldering pads. 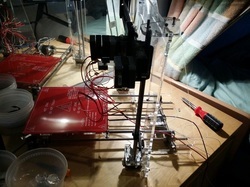 Here its a shot of the heated bed attached to the Y carriage. It needs to be attached with four screws which will allow you to level it. Over the heated bed goes a piece of 8x8 inches window glass panel. 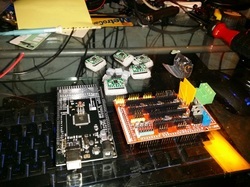 Here are the electronics, the Arduino Mega in black, Rampbs board in red, and behind them you can see the stepper motor drivers. 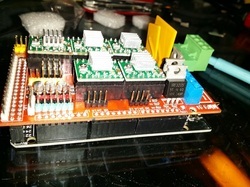 Here its a shot of the electronics all together, stacked like a sandwich. The ramps goes on the Arduino Mega, and the stepper motor drivers go on the Mega. 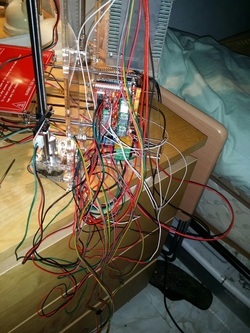 Connecting and organizing the wires was a mess. Here you can see the rats nest that is made when you connect all the wires without organizing them. It took me like half an hour to organize every single wire based on their purpose. I have done some changes to the electronics and I still keep them somewhat organized for ease of troubleshooting.
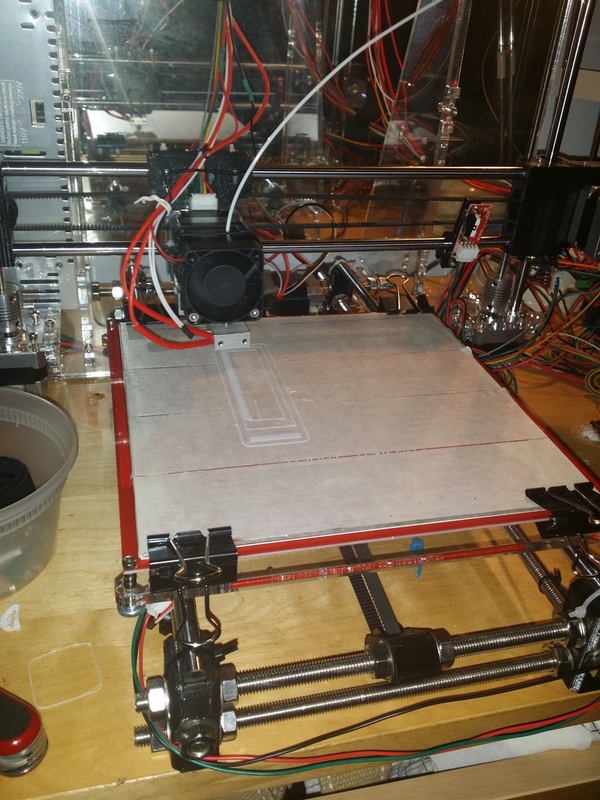
 Here you can see how my wires for the extruder go over the frame. I placed them in a way that they can move freely up and down and side to side. I printed a little loop that goes in the frame, which holds them in place and still leaves them with enough slack to move, in a next post I will show you some of the upgrades I have printed. 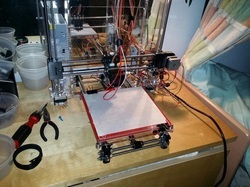 And there we go, here its a shot of the printer fully built. At the time of the writing of this post, the printer looks completely different because I have printed some of the parts again, and also printed some needed upgrades to improve the functionality.
|
Angel MercedesElectrical Engineering student and lover of all things Open Source, 3D Printing, Electronics and Linux. Categories
All
Archives
May 2017
|


 RSS Feed
